Start Your Debian Terminal with cowsay

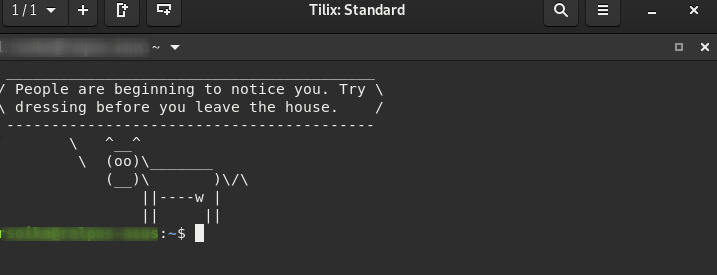
Cowsay is a Linux tool drawing a cow with a bubble into your terminal.

To have more fun starting your bash you can add it into your bash configuration in Debian:

$ sudo apt-get install cowsay fortune

Next edit your ~/.bashrc file and add the following script at the end of this config file:

if [ -x /usr/games/cowsay -a -x /usr/games/fortune ]; then
    fortune | cowsay
fi

That’s it.

How to Measure Network Speed?

Even if most people use the ‘ping‘ command to test a network connection this tool is not build to get a realistic indication about a network connection. This is due to the internal protocol used by ping. If you really want to know how fast is your network connection – e.g. between to servers – you should use the command line tool ‘iperf‘.

If you want to measure the network performance between to servers – e.g. server-a and server-b, first start the tool on the one side of your two servers:

server-a:$ iperf -s
------------------------------------------------------------
Server listening on TCP port 5001
TCP window size:  128 KByte (default)
------------------------------------------------------------

This command starts a server listening on port 5001 (you can change the port number if blocked by firewall rules).

Now you can start a test with a client connection from server-b to server-a:

server-b:$ iperf -c server-a
------------------------------------------------------------
Client connecting to server-a, TCP port 5001
TCP window size: 85.0 KByte (default)
------------------------------------------------------------
[  3] local 10.0.0.2 port 55622 connected with 10.0.0.3 port 5001
[ ID] Interval       Transfer     Bandwidth
[  3]  0.0-10.0 sec  1.09 GBytes   935 Mbits/sec

in this example, ipref is sending about 1GB from server A to server B with a network speed of 930Mbits per second.

Ceph Warning that Won’t Resolve

If ceph is having a temporarily problem – e.g. a node goes down – it may happen, that you see constanctly a waring in the Web UI or also if you run

$ ceph status

In case the message is

.. daemons have recently crashed

but your ceph is up an running again and you can not see any more concerning messages you can remove the messages the force this kind of status. To do this you can run the following form your ceph console:

ceph crash ls
# lists all crash message

ceph crash archive-all
# moves the messages into the archive

This will bring back the health status to HEALTH_OK.

NFS and Iptables

These days I installed a NFS Server to backup my Kubernetes Cluster. Even as I protected the NSF server via the exports file to allow only cluster members to access the server there was still a new security risk. NSF comes together with the Remote Procedure Call Daemon (RPC). And this daemon enables attackers to figure out information about your network. So it is a good idea to protect the RPC which is running on port 111 from abuse.

To test if your server has an open rpc port you can run a telnet from a remote node:

$ telnet myserver.foo.com 111
Trying xxx.xxx.xxx.xxx...
Connected to myserver.foo.com.

This indicates that rpc is visible from the internet. You can check the rpc ports on your server also with:

$ rpcinfo -p
   program vers proto   port  service
    100000    4   tcp    111  portmapper
    100000    3   tcp    111  portmapper
    100000    2   tcp    111  portmapper
    100000    4   udp    111  portmapper
    100000    3   udp    111  portmapper
    100000    2   udp    111  portmapper

Iptables

If you run Kubernetes or Docker on a sever you usually have already Iptables installed. You can test this by listing existing firewall rules. With the option -L you can list all existing rules:

$ iptables -L 
Chain INPUT (policy ACCEPT)
target     prot opt source               destination         

Chain FORWARD (policy DROP)
target     prot opt source               destination         
DOCKER-USER  all  --  anywhere             anywhere            
DOCKER-ISOLATION-STAGE-1  all  --  anywhere             anywhere            
ACCEPT     all  --  anywhere             anywhere             ctstate RELATED,ESTABLISHED
DOCKER     all  --  anywhere             anywhere            
ACCEPT     all  --  anywhere             anywhere            

Chain OUTPUT (policy ACCEPT)
target     prot opt source               destination         

Chain DOCKER (1 references)
target     prot opt source               destination         
ACCEPT     tcp  --  anywhere             172.17.0.2           tcp dpt:9042
ACCEPT     tcp  --  anywhere             172.17.0.2           tcp dpt:afs3-callback

Chain DOCKER-ISOLATION-STAGE-1 (1 references)
target     prot opt source               destination         
DOCKER-ISOLATION-STAGE-2  all  --  anywhere             anywhere            
RETURN     all  --  anywhere             anywhere            

Chain DOCKER-ISOLATION-STAGE-2 (1 references)
target     prot opt source               destination         
DROP       all  --  anywhere             anywhere            
RETURN     all  --  anywhere             anywhere            

Chain DOCKER-USER (1 references)
target     prot opt source               destination         
RETURN     all  --  anywhere             anywhere

This is an typical example you will see on a sever with Docker daemon installed. Beside the three default chains ‘INPUT’, ‘FORWARD’ and ‘OUTPUT’ there are also some custom Docker chains describing the rules.

So the goal is to add a new CHAIN containing rules to protect the RPC daemon from abuse.

Backup your Origin iptables

Before you start adding new rules make a backup of your origin rule set:

$ iptables-save > iptables-backup

This file can help you if something goes wrong later…

Adding a RPC Rule

If you want to use RPC in the internal network but prohibit it from the outside, then you can implement the following iptables. In this example I explicitly name the cluster nodes which should be allowed to use RPC port 11. All other request to the PRC port will be dropped.

Replace [SEVER-NODE-IP] with the IP address from your cluster node:

$ iptables -A INPUT -s [SERVER-NODE-IP] -p tcp --dport 111 -j ACCEPT
$ iptables -A INPUT -s [SERVER-NODE-IP] -p udp --dport 111 -j ACCEPT
$ iptables -A INPUT -p tcp --dport 111 -j DROP
$ iptables -A INPUT -p udp --dport 111 -j DROP

This rule explicitly allows SEVER-NODE-IP to access the service and all other clients will be drop. You can easily add additional Nodes before the DROP.

You can verify if the new ruleset was added to your existing rules with:

$ iptables -L

You may write a small bash script with all the iptables commands. This makes it more convenient testing your new ruleset.

Saving the Ruleset

Inserting new rules into the firewall carries some risk by its own. If you do something wrong you can lockout your self from your sever. For example if you block the SSH port 22.

The good thing is, that rules created with the iptables command are stored in memory. If the system is restarted before saving the iptables rule set, all rules are lost. So in the worst case you can reboot your server to reset your new rules.

If you have tested your rules than you can persist the new ruleset.

$ iptables-save > iptables-newruleset

After a reboot yor new rules will still be ignored. To tell debian to use the new ruleset you have to store this ruleset into /etc/iptables/rules.v4

$ iptables-save > /etc/iptables/rules.v4

Finally you can restart your server. The new rpc-rules will be applied during boot.
Use Docker Instead of Kubernetes

Today we are all talking about Containers and container based infrastructure. There is a lot of hype and noise about this topic. But what is this container technology? And how does it solve today problems? I am using containers by myself and of course I am fascinated from this server technology. Containers can really simplify things. After more than 20 years in building server applications I have experienced many problems very closely. I call it “server technology“, which may sound a little strange to some. Are containers not more of a cloud technology? And this is the one thing that really bothers me is this current hype. When I talk about containers many people think about this Kubernetes thing. And this was the impulse to write this article. Continue reading “Use Docker Instead of Kubernetes”

Docker Service to Backup a PostgreSQL / MySQL Database

I have written a docker service to be used for a periodically backup of a PostgreSQL Database. This container can be used to be part of a docker stack in a docker-compose.yml file.

version: '3.1' 
services:
...
backup:
image: imixs/backup
environment:
SETUP_CRON: "0 3 * * *"
BACKUP_DB_TYPE: "POSTGRESQL"
BACKUP_DB_USER: “postgres”
BACKUP_DB_PASSWORD: “xxxxxxxxxx”
BACKUP_DB_HOST: “db”
BACKUP_LOCAL_ROLLING: “5” ....

The service runs a cron job an uploads backup files automatically into a remote backup space via SFTP/SCP.

Backup MySQL

You can also use this Docker Image to backup a MySQL Database. Just change the environment variable ‘BACKUP_DB_TYPE’:

BACKUP_DB_TYPE: "MYSQL"

Of course the service also provides methods to restore the data. The Service is published on GitHub and DockerHub where you will find more details.

Lightweight Docker Swarm Environment

In the following short tutorial I want to show how to setup a lightweight and easy to manage docker-swarm environment. This environment is an alternative to the mostly heavyweight solutions like Rancher or Googles Kubernetes. For developers and companies that are not compelled to operate over 1000 machines on 4 different continents, this can be a clever alternative.

The docker-swarm environment, I am demonstrating here, uses Docker Engine CLI commands entered into a terminal. But as we’ll see, this environment also includes a very nice UI front end. You should be able to install Docker on networked machines and be comfortable with running commands in the shell of your choice.

Continue reading “Lightweight Docker Swarm Environment”

How to Setup a Private Docker Registry

In this short tutorial I will show how to setup a private Docker registry. A private registry can be helpful if you want to distribute docker images in a large developer team or provide docker images to your customers. The tutorial assumes that you have a server with a docker daemon running in your network environment or internet. The goal is to push locally build docker images to the docker registry, so that other team members or customers can pull those images without the need to build the images from a Docker file. In the Imixs-Workflow Project we use such a private registry to support our customers with custom docker images. Continue reading “How to Setup a Private Docker Registry”

Deploy Gitbucket on Wildfly

When trying to deploy the Gitbucket project into wildfly I go tthe following error message:

WARN [org.jboss.modules] (ServerService Thread Pool -- 81) Failed to define class liquibase.serializer.core.yaml.YamlSerializer$LiquibaseRepresenter in Module "deployment.gitbucket.war:main" from Service Module Loader: java.lang.NoClassDefFoundError: Failed to link liquibase/serializer/core/yaml/YamlSerializer$LiquibaseRepresenter (Module "deployment.gitbucket.war:main" from Service Module Loader): org/yaml/snakeyaml/representer/Representer ...

This is a known issue and discussed here.

You can fix it if you add the file ‘jboss-deployment-structure.xml’ into the WEB-INF/ folder with the following content:

<jboss-deployment-structure>
  <deployment>
    <dependencies>
      <system export="true">
        <paths>
          <path name="com/sun/net/ssl/internal/ssl" />
          <path name="com/sun/net/ssl" />
        </paths>
      </system>
      <!-- add snakeyaml dependency -->
      <module name="org.yaml.snakeyaml"/>
    </dependencies>
  </deployment>
</jboss-deployment-structure>

How to install:

The following is a short install guide how to modify the gitbucket.war downloaded form the project release page:

1.) Download latest version from release page:

wget https://github.com/gitbucket/gitbucket/releases/download/4.7.1/gitbucket.war

change the version if needed

2.) unzip the war file

unzip gitbucket.war -d tmp/gitbucket.war

3.) create the ‘jboss-deployment-structure.xml’ file and add the content as explained above. Than copy the file into the WEB-INF folder

cp jboss-deployment-structure.xml /tmp/gitbucket.war/WEB-INF/

4.) create the doDeploy file

touch tmp/gitbucket.war/gitbucket.war.dodeploy

5.) start deployment by moving the folder to the wildfly deploy directory

cd tmp/
mv gitbucket.war /opt/wildfly/standalone/deployments/

Install Script

You can use also my install script from here to install gitbucket on Wildfly 9.x & 10.x under Linux.

/bin/bash wildfly-install.sh [INSTALLDIR] [GITBUCKET-VERSION]

You can specify the install directory of your wilfly installation and the gitbucket version.

Example:

/bin/bash wildfly-install.sh [INSTALLDIR] [GITBUCKET-VERSION]

Note: The script must be run as root. The script assumes that wildfly is running with the user ‘wildfly’. You can change this in your script if needed.