
In this short tutorial I will show how to setup a private Docker registry. A private registry can be helpful if you want to distribute docker images in a large developer team or provide docker images to your customers. The tutorial assumes that you have a server with a docker daemon running in your network environment or internet. The goal is to push locally build docker images to the docker registry, so that other team members or customers can pull those images without the need to build the images from a Docker file. In the Imixs-Workflow Project we use such a private registry to support our customers with custom docker images.
Run the the Docker Registry
You can easily start a private registry from the official Docker image ‘registry:2’. To start the registry on your server run:
@dock01:$ docker run -d -p 5000:5000 registry:2
You can also map the default port 5000 to another port which suits your network infrastructure:
@dock01:$ docker run -d -p 8444:5000 registry:2
In the following examples I will use the default port 5000.
Now you can push a local image into this registry using the push command. In the following example I push my reverse proxy nginx Docker Image into the local registry:
@dock01:$ docker tag imixs/proxy localhost:5000/proxy:1.0.0
@dock01:$ docker push localhost:5000/proxy:1.0.0
The push refers to a repository [localhost:5000/proxy]
3bf2415101eb: Pushed .. .... ..... 1.0.0: digest: sha256:eaeaebaf8e12ffe2c341c6cdc818973f01fefd35c1da2f2e35d589c3076934b0 size: 3013 imixs@dock01:~/nginx$
Note: This will only work on the server with the hostname ‘localhost’. If you try to pull/push an image from a remote host (e.g. you local pc) the command will fail! The reason is that the Docker Daemon will reject connections from remote clients without an valid TLS (Transport Layer Security).
Create a Self Signed Certificate
To solve the problem with the missing TLS you can create a self signed certificate on your server to use it for the private Docker Registry.
You can easily create a certificate with the OpenSSL-Tool.
@dock01:$ mkdir registry_certs
@dock01:$ openssl req -newkey rsa:4096 -nodes -sha256 \
                -keyout registry_certs/domain.key -x509 -days 356 \
                -out registry_certs/domain.cert
Generating a 4096 bit RSA private key
.......................++
...............................................................................................................................................++
writing new private key to 'registry_certs/domain.key'
-----
You are about to be asked to enter information that will be incorporated
into your certificate request.
What you are about to enter is what is called a Distinguished Name or a DN.
There are quite a few fields but you can leave some blank
For some fields there will be a default value,
If you enter '.', the field will be left blank.
-----
Country Name (2 letter code) [AU]:DE
State or Province Name (full name) [Some-State]:
Locality Name (eg, city) []:
Organization Name (eg, company) [Internet Widgits Pty Ltd]:
Organizational Unit Name (eg, section) []:
Common Name (e.g. server FQDN or YOUR name) []:dock01
Email Address []:
imixs@dock01:~$ ls registry_certs/
domain.cert domain.key
Here I created a x509 certificate and a private RSA key. The ‘Common Name’ here is important as this is the server host name.
Finally you have two files:
- domain.cert – this file can be handled to the client using the private registry
- domain.key – this is the private key which is necessary to run the private registry with TLS
Run the Private Docker Registry with TLS
Now we can start the registry with the local domain certificate and key file:
@dock01:$ docker run -d -p 5000:5000 \
 -v $(pwd)/registry_certs:/certs \
 -e REGISTRY_HTTP_TLS_CERTIFICATE=/certs/domain.cert \
 -e REGISTRY_HTTP_TLS_KEY=/certs/domain.key \
 --restart=always --name registry registry:2
Here we map the folder /registry_certs as an volume into the docker registry container. We use environment variables pointing to the certificate and key file.
Now again you can push your local image into the new registry:
@dock01:$ docker push localhost:5000/proxy:1.0.0
Access the Remote Registry form a local Client
Now as the private registry is started with TLS Support you can access the registry from any client which has the domain certificate.
There for the certificate file “domain.cert” must be located on the client in a file
@local:$ /etc/docker/certs.d/<registry_address>/ca.cert
Where <registry_address> is the server host name. After the certificate was updated you need to restart the local docker daemon:
@local:$ mkdir -p /etc/docker/certs.d/dock01:5000
@local:$ cp domain.cert /etc/docker/certs.d/dock01:5000/ca.crt
@local:$ service docker restart
Now finally you can push you images into the new private registry:
@local:$ docker tag imixs/proxy dock01:5000/proxy:dock01
@local:$ docker push dock01:5000/proxy:dock01
Note: In all the examples I used here you need to replace the hostname ‘dock01’ with your remote server domain name!
You can verify you remote registry also via web browser:
https://yourserver.com:5000/v2/_catalog
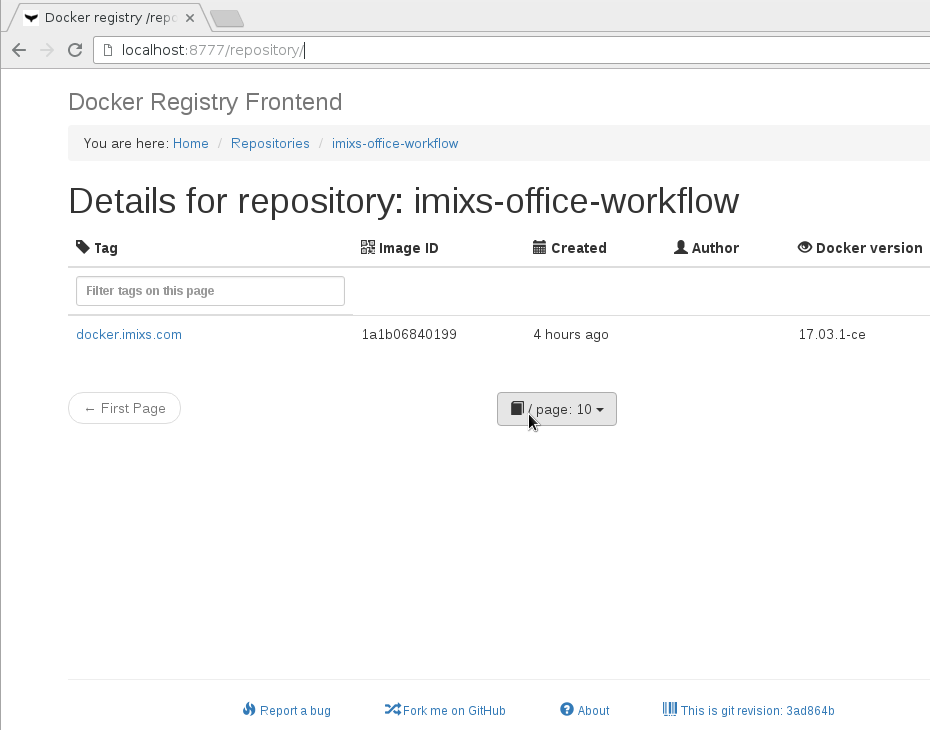
The Docker Registry Frontend
The project konradkleine/docker-registry-frontend provides a cool web front-end which can be used to simplify access to the registry through a web browser.
The docker-registry-frontend can be started as a docker container. Assuming your registry runs on
use the following docker run command to start the frontend container:
 docker run \
 -d \
 -e ENV_DOCKER_REGISTRY_HOST=yourserver.com \
 -e ENV_DOCKER_REGISTRY_PORT=5000 \
 -e ENV_DOCKER_REGISTRY_USE_SSL=1 \
 -p 0.0.0.0:80:80 \
 konradkleine/docker-registry-frontend:v2
You can now access your registry via web browser url:
The Imixs-Cloud Project on GitHub
I started the public project Imixs-Cloud on GitHub containing a complete concept for a Docker Swarm environment including a private registry. There you will find additional information and you can also share ideas and ask questions.
nice and handy, thanks!
Many thanks for the article!
Hey man.. nice work! I would like to access from other computer using my local network, ex:
pc1 – 10.0.0.1 (registry a tag alpine)
pc2 – 10.0.0.2 (docker pull 10.0.0.1/alpine)
I could not. Can you help me?
Thanks
Your client (pc2 – 10.0.0.2) need also the domain certificate to be allowed to access the registry.
Hey Ralph,
Is there a way to avoid copying the certificate to the client?
I understand the client needs to accept the self signed certificate. What I’m expecting is a way to not deploy the certificate to each client that I’m using.
Thanks a lot for this tutorial. I wonder the Docker is secure for confidential data and also if we need to pay for private registry.
You can add additional security for a private docker registry (e.g. HTTP BASIC Authentication)
You may have a look at my new github project Imixs-Cloud
It describes a complete docker swarm environment including also a private registry.
https://github.com/imixs/imixs-cloud
Everything worked except the certificate part, with following error:
https://github.com/docker/distribution/issues/948
Had to follow the directions as suggested in the issue:
Stopped and removed the running docker registry:2
Edited the file /etc/ssl/openssl.cnf on the registry:2 host and added
subjectAltName = IP:192.168.2.102 into the [v3_ca] section. Like the following:
…
[ v3_ca ]
subjectAltName = IP:192.168.1.102
…
Recreated the certificate using the same steps and information as defined above
Copied the new certificate using the same steps as defined above on all four hosts
Started registry:2 image using the same steps as defined above
Thanks for sharing . esp. The client for management
Sir, what is the host OS? can i install it on Debian 9
Yes of course. Docker runs on any linux platform.