Eclipse Mars on Debian Jessie with Gnome 3

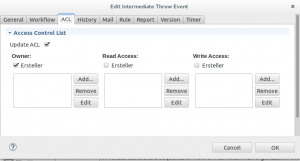
After downloading the new Eclipse IDE Mars I was disappointed of the corrupted design. Several dialog pages did not work as expected or were empty until the dialog window was resized.

eclipse_mars_properties_dialog_bpmn

As Eclipse release 4.5 (Mars)  is based on GTK 3, the problem in my case was the missing library “gtk3-engines-oxygen”. This it the so called Oxygen widget theme for GTK3-based applications like the Eclipse Mars release.

After installing the missing library with apt:

apt-get install gtk3-engines-oxygen

the Eclipse Mars Release works perfect!

eclipse_mars_gtk_screen_11

Customize Eclipse them Jeeeyul’s Eclipse Themes

A very nice plug-in for Eclipse is the ‘Jeeeyul’s Eclipse Themes‘.  This plug-in provides a set of cool themes for eclipse and also a cool editor to customize the theme individually.

Adjusting the window margins

Another annoying thing in Eclipse GTK with Gnome is the small margin between to windows so you cant grasp the space with the mouse to resize the view.This problem can also be solved directly with the Jeeeyul’s plug-in:

In the ‘General’ section of the Jeeeyul’s Themes section you can change the “Winddow Pacing”. Disable the option ‘Cast Shadow’ and set ‘Part Stack Spacing’ to 5 and ‘Margins’ to 0. After that you need to restart Eclipse.

Alternative: Disable GTK3

An alternative is to simply deactivate GTK3 for Eclipse Mars. You need to set the environment variable ‘SWT_GTK3’ to ‘0’.

I am using the following bash start script to launch Eclipse Mars:

#!/bin/bash
cd /opt/eclipse-jee-mars/
export SWT_GTK3=0
./eclipse

See also the comments below.


Using Fonts Instead Of Icons For Responsive Web Design

Usually in most web applications icons are used for an appealing design. But icons have the disadvantage that you can’t  change the design easily without replacing the hole set of icons especially if you need different colors or a different size of your iconset. The last one becomes a big problem when you try to develop a responsive web design. Continue reading “Using Fonts Instead Of Icons For Responsive Web Design”

Open Source – what does it really mean?

Open Source is one of the most misunderstood domains in our new society. I just read an article about the failure of the sharing economy. The author closed with the idea, that really no one would like to share something if he doesn’t get something back which brings him into an better position. And this is not inhumane.
The failure of the sharing economy brings me to new thoughts about open source. I am working in a open source project since several years. What does it mean to me? It is not to give my work to other companies for free. We run a company which provides commercial services. These services mean: “Hey we have a cool fancy technology. If you like it, we can help you to get started“. And this is because software development is not one of the easiest things in our live.
So what I am sharing in my open source project is not the enterprise software to be used by the big industry for free. I just share my thoughts about problems in the area of software development. My thoughts are open for anyone who is interested in discussing those kinds of software problems. It’s like sitting in the pub and talking with someone about the last football match. Just sharing thoughts and come up with new ideas. That’s the meaning of Open Source.

JSF 2 and bookmarkable URLs

With JEE6 and JSF2 we finally have the great feature of bookmarkable URLs. This fixes one of the most awful faults of JSF that pages were not bookmarkable. An application can now become bookmarkable with some modifications. (See details about bookrmarkble URLs in Ryan Lubke’s Blog)

In a JSF web application you will usually have a <h:command link> or <h:commandbutton> like this:

<h:commandLink action="#{workflowController.load()}">
    <h:outputTextvalue="My action link" />
</h:commandLink>

In this example the action method returns a navigation outcome. Since JSF2 this action outcome can be also a jsf page URL (e.g /page/my_page.xhml), so no more explicit navigation rule is necessary. But the result is not bookmarkable.

To replace this with a bookmarkable URL you can replace the JSF component with the new  <h:link>. See the following example:

<h:link outcome="#{workflowController.load()}">
    <f:param name="id" value="#{workitem.item['$uniqueid']}"/>
    <h:outputText value="My action link" />
</h:link>

The trick here is, that the link is extended with a URL query param ‘id’.  Now the HTML outcome of the JSF component will look like this.

<a href="http://localhost:8080/myapp/page/my_page.xhtml?id=1">My action Link</a>

The result is simmilar to a <h:commandLink> with the difference that the URL is now set to the browsers URL. So far this new link can be bookmarked, but it is not automatically working. To resolve this new URL you have to customize your jsf page to evaluate the new query param (in this example my_page.xhml).

You can add the following metadata tag to extract the ID.

<h:head>
 <f:metadata>
 <f:viewParam name="id" value="#{workflowController.deepLinkId}" />
 </f:metadata>
</h:head>

In my example I have a method ‘getDeepLinkId’ in my workflowController Bean. The method just loads the corresponding object into my controller.

public void setDeepLinkId(String adeepLinkId) {
 this.deepLinkId = adeepLinkId;
   if (deepLinkId != null && !deepLinkId.isEmpty()) {
       // load the business object....
       this.load(deepLinkId);
       // finally destroy the deepLinkId to avoid a reload on the next
       // post event
       deepLinkId = null; // !
    }
 }

This method is necessary so in case the bookmarkable URL is requested later from a user we load the corresponding Object before we load the page.

That’s it.

h:command Buttons

The bookmarkable URLs can become a little bit tricky if you have more complex action methods. For example I used in a h:commandButton like this:

<h:commandButton action="#{workflowController.process}" value="My button">
 <f:setPropertyActionListener
    target="#{workflowController.workitem.item['$ActivityID']}"
     value="#{activity.item['numactivityid']}" />
</h:commandButton>

This is a case where replacing <h:commandButton> with <h:button> will not work out of the box. This is because the outcome property can not evaluate the action result which can – in my case – also become null. To solve this the navigation rules come back into the game. You can achieve the same result as shown in the first example with a navigation rule placed in the faces-config.xml. See the following example:

<navigation-rule>
   <navigation-case>
   <from-outcome>workitem</from-outcome>
   <to-view-id>/page/my_page.xhtml</to-view-id>
   <redirect>
     <view-param>
       <name>id</name>
       <value>#{workflowController.workitem.item['$uniqueid']}</value>
     </view-param>
   </redirect>
 </navigation-case>
</navigation-rule>

Now I moved the param ‘id’ out to the navigation rule with the identifier ‘workitem’. If my action result form the h:commandButton is ‘workitem’ the navigation rule computes the bookmarkable URL:

<a href="http://localhost:8080/myapp/page/my_page.xhtml?id=1">My action Link</a>

I hope this short examples will help you to build bookmakrable jsf applications.

Using “curl” to request the Imixs-Workflow Rest API

The command line tool ‘curl’ is useful in cases when you just want to check some REST APIs from a console. You can find a lot of information about how to use curl on curl.haxx.se.

If you want to test the Imixs Rest API you need in most cases a basic authentification against the Workflow Server. This is an example how to send username/password along with a GET request:

curl --user admin:mypassword http://localhost:8080/imixs-microservice/workflow/worklist

This examples returns the worklist for the User ‘admin’ from a Imixs-Workflow Rest Service running on localhost port 8080.

If you don’t specify the media type Imixs-Workflow will return an HTML output. You can see this also in your Browser. But Imixs-Workflow also supports the media types JSON and XML. To request the same URL in JSON you can add a Header parameter like this:

curl --user admin:mypassword -H "Accept: application/json" http://localhost:8080/imixs-microservice/workflow/worklist

or if you want to get the same response in XML format:

curl --user admin:mypassword -H "Accept: application/xml" http://localhost:8080/imixs-microservice/workflow/worklist

If you know the UniqueID of a workitem, which is included in the worklist result you can also request a single Workitem from the Imixs-Workflow. See the following curl example to request a workitem in JSON format:

curl --user admin:adminadmin -H "Accept: application/json" http://localhost:8080/imixs-microservice/workflow/workitem/14b65352f58-259f4f9b

This example returns the content of the Workitem with the UniqueID ’14b65352f58-259f4f9b’. You can also restrict the result to a subset of properties when you add the query parameter ‘items’:

curl --user admin:adminadmin -H "Accept: application/json" http://localhost:8080/imixs-microservice/workflow/workitem/14b65352f58-259f4f9b?items=txtname;$processid

See the Imixs-Workflow RestAPI for more information.

If you want to test what is possible with Imixs-Workflow REST API and curl you can try the Imixs-Microservice. Imixs-Microservice provides a full featured Workflow System based on a REST API. Imixs-Microservice also supports Docker so you do not need to install a Application Server by your self.

JSF and Transactioncontext

Today I want to talk about a detail in the JSF Framework, which is on the first view not obviously. In different to Spring, business logic placed in a JSF front-end controller (JSF Backing Beans) did not initializes a separate transaction context. Normally business logic which need to be transaction save should be spread out into EJBs. EJBs are the recommended place for business logic. So in JSF/EJB business logic should be put into stateless session EJBs and controlled the page flow of a web application through the so called front end controllers  – JSF Backing beans. As I mentioned before spring starts a transaction context also in front-end controllers, but jsf does not.

So what is the problem here? When you look at the following JSF example, you maybe will not recognize the problem at first:

//jsf bean...
@EJB ejb1;
...
public String process(businessobject) {
 ejb1.op1(businessobject);
 ejb1.op2(businessobject);
 ....
}

The JSF front-end controller method ‘process(businessobject)’ injects an EJB and calls two ejb methods. This will propaply work without any side effects. But it can produce errors in some cases. The problem in this pattern is that the front-end controller performed two apparently dependent business actions completely separately. If these two methods need to be transaction save but are operating on the same database entities this can result in serious problems. In a high concurrent system indeed this pattern can cause a corrupted DB state even if you thought JPA will solve all the transaction stuff for you.

The reason for the unexpected behavior is the missing wrapping transaction. Each ejb method starts it own transaction with all the transaction control provided by the ejb container. But the hole business method is not transaction save.

To solve this you have two possible solutions:

1) add a UserTranaction context to the front-end controller:

//jsf bean...
@Resource UserTransaction tx;
@EJB ejb1;
...
public String process(businessobject) {
 try {
   tx.begin();
   ejb1.op1(businessobject);
   ejb1.op2(businessobject);
 finaly {
   tx.commit();
 }....
}

In this example now the jsf controller starts itself the UserTransaction. As a result both EJB methods (with default transaction mode ‘mandatory’) run in the same transaction context. Even operations on the database in a high concurrent system will be transaction save.

2) Merge the EJB Methods into one transaction save business method

The second solution merges both ejb methods into a single EJB method call:

// JSF bean calls new ejb method...
public String process(Entity entity) {
 ejb1.op1op2(entity);
 // ...
}

with the following ejb implementation:

// EJB
public void op1op2(Entity entity) {
 op1(entity);
 op2(entity);
}

Now the new ejb method is transaction save an there is no need to fiddle with UserTransaction in the jsf fornt-end controller.

The second solution is recommended because there is no more risk that the transaction context is split by the front-end. And you can reuse the new ejb method easily with now need to think about the transaction context scenarios.

Maybe this will help you solving some problems with jsf transaction context in the future.

Debian – gdm3 and Gnome broken after dist-upgrade

Yesterday I upgraded my debian testing release (jessie) and after that the Gnome Desktop and also gdm3 (the Desktop Manager to login) was broken. I installed lightdm and xfce to get back a working desktop. But I can’t figure out whats going wrong until my last upgrade.

Finally I found help in this forum thread.

So I removed all the nvidia packages (I had no nvidia graphic card but a Intel HD3000)

apt-get remove --purge nvidia-*

Next I reinsalled gdm3, gnome and reconfigured finally gdm3

apt-get --reinstall install gdm3
apt-get --reinstall install gnome
apt-get --reinstall install gnome-shell
dpkg-reconfigure gdm3

After that procdure my system worked again!

I don’t understand why a dist-upgrade on a system with not nvidia graphic card leads into such a strange situation.

Corrupted /tmp folder

Additional I was affected from a corrupted /tmp folder which shows the wrong size. To solve this I found the following Blog Post.

http://deshack.net/debian-hangs-during-boot/

  1. press ‘e’ during the grub boot loader
  2. add the following to the end of the line starting with /boot/vmlinuz…
    –add rw init=/bin/bash
  3. press f10 to boot with that configuration – system will start in a bash
  4. remove and create the tmp folder
    >rm -rf /tmp
    >mkdir /tmp
    >chmod  1777 /tmp
  5. reboot system

This helps me to create a new empty /tmp folder.