
In this blog I will explain how to install the Ceph storage system on CentOS. In my previous blog I showed how to install ceph on Debian. But the newer version of ceph are not supported by Debian and Ceph is much better supported by CentOS because RedHat maintains both CentOS and Ceph.
In this blog I will install Ceph ‘Nautilus’ on CentOS 7. You will find detailed information about ceph and the installation process for nautilus release here.
The Architecture
I assume you have installed 4 nodes running CentOS 7.
- master-1 – this is our master node we use to install the ceph cluster
- node-1 – this is our cheph cluster-node 1
- node-2 – this is our cheph cluster-node 2
- node-2- this is our cheph cluster-node 3
To install a ceph cluster you can use the tool ‘ceph-deploy’ this tool can be executed on a separate node (in my case the master-1). So there is no need to install ceph manually on each cluster-node separately.
Get Packages
First you need to add update the package sources
$ sudo rpm --import 'https://download.ceph.com/keys/release.asc'For the ceph nautilus release, you should add a Ceph entry to the /etc/yum.repos.d directory. Create a ceph.repo file with the following content
[ceph]
name=Ceph packages for $basearch
baseurl=https://download.ceph.com/rpm-nautilus/el7/$basearch
enabled=1
priority=2
gpgcheck=1
gpgkey=https://download.ceph.com/keys/release.asc

[ceph-noarch]
name=Ceph noarch packages
baseurl=https://download.ceph.com/rpm-nautilus/el7//noarch
enabled=1
priority=2
gpgcheck=1
gpgkey=https://download.ceph.com/keys/release.asc

[ceph-source]
name=Ceph source packages
baseurl=https://download.ceph.com/rpm-nautilus/el7/SRPMS
enabled=0
priority=2
gpgcheck=1
gpgkey=https://download.ceph.com/keys/release.asc
Note: in this file I specify the centos version (el7) and the ceph release ‘nautilus’. You can check the available releases here.
Create a Ceph Deploy User
The ceph-deploy utility must login to a Ceph node as a user that has passwordless sudo privileges, because it needs to install software and configuration files without prompting for passwords.
If you do not have a non-previleged cluster user follow the next steps and replace ‘{username}’ with the name of our cluster user you have choosen.
$ useradd -m {username} -s /bin/bash
$ passwd {username}
$ echo "{username} ALL = (root) NOPASSWD:ALL" | sudo tee /etc/sudoers.d/{username}
$ sudo chmod 0440 /etc/sudoers.d/{username}
Next create a SSH key on the master node and distribute the public key to each worker node. Leave the passphrase and filename empty
# login with your cluster user
$ su {username}
$ ssh-keygen
The keys will be stored in the .ssh/ directory. Now you can copy the key to all worker nodes:
$ ssh-copy-id {username}@node1
$ ssh-copy-id {username}@node2
$ ssh-copy-id {username}@node3
For background information see also here.
Install Ceph-Deploy
To install ceph-deploy with yum, execute the following:
$ sudo yum install ceph-deployInstall the Ceph-Cluster
Now as you have installed ceph-deploy and created ssh access to your ceph nodes you can create a new ceph cluster. You can find details about this procedure here.
First create a working directory to store you configurations.
$ mkdir ceph-cluster
$ cd ceph-cluster
On your master node from the directory you created start to create the cluster:
$ ceph-deploy new node1 node2 node3You can verify the Ceph configuration in the file ‘ceph.conf’
$ cat ceph.confNext install Ceph packages:
$ ceph-deploy install --release nautilus node1 node2 node3The ceph-deploy utility will install Ceph on each node.
Note: The release must match the release you have installed on your master node!
Deploy the initial monitor(s) and gather the keys:
$ ceph-deploy mon create-initialUse ceph-deploy to copy the configuration file and admin key to your admin node and your Ceph Nodes
$ ceph-deploy admin node1 node2 node3Deploy a manager daemon. (Required only for luminous+ builds):
$ ceph-deploy mgr create node1Next create metadata servers:
$ ceph-deploy mds create node1 node2 node3At this point, you can check your cluster status.. SSH into one of the ceph nodes and run:
$ sudo ceph status Create Object Store Daemons (OSDs)
Now you can create the OSDs on your ceph nodes. For the purposes of these instructions, I assume you have an unused disk in each node called /dev/vdb. Be sure that the device is not currently in use and does not contain any important data.
You can fetch a list a of available disks on a specific node:
$ ceph-deploy disk list node-1
Note: the device does not have to be mounted in a directory.
You can run multiple OSDs on the same host, but using the same storage drive for multiple instances is a bad idea as the disk’s I/O speed might limit the OSD daemons’ performance.
So just create on OSD on each node.
ceph-deploy osd create --data {device} {ceph-node}For example:
ceph-deploy osd create --data /dev/vdb node1
ceph-deploy osd create --data /dev/vdb node2
ceph-deploy osd create --data /dev/vdb node3
Check your cluster’s health.
$ ssh node1 sudo ceph health
HEALTH_OK
You ceph cluster is now ready to use!
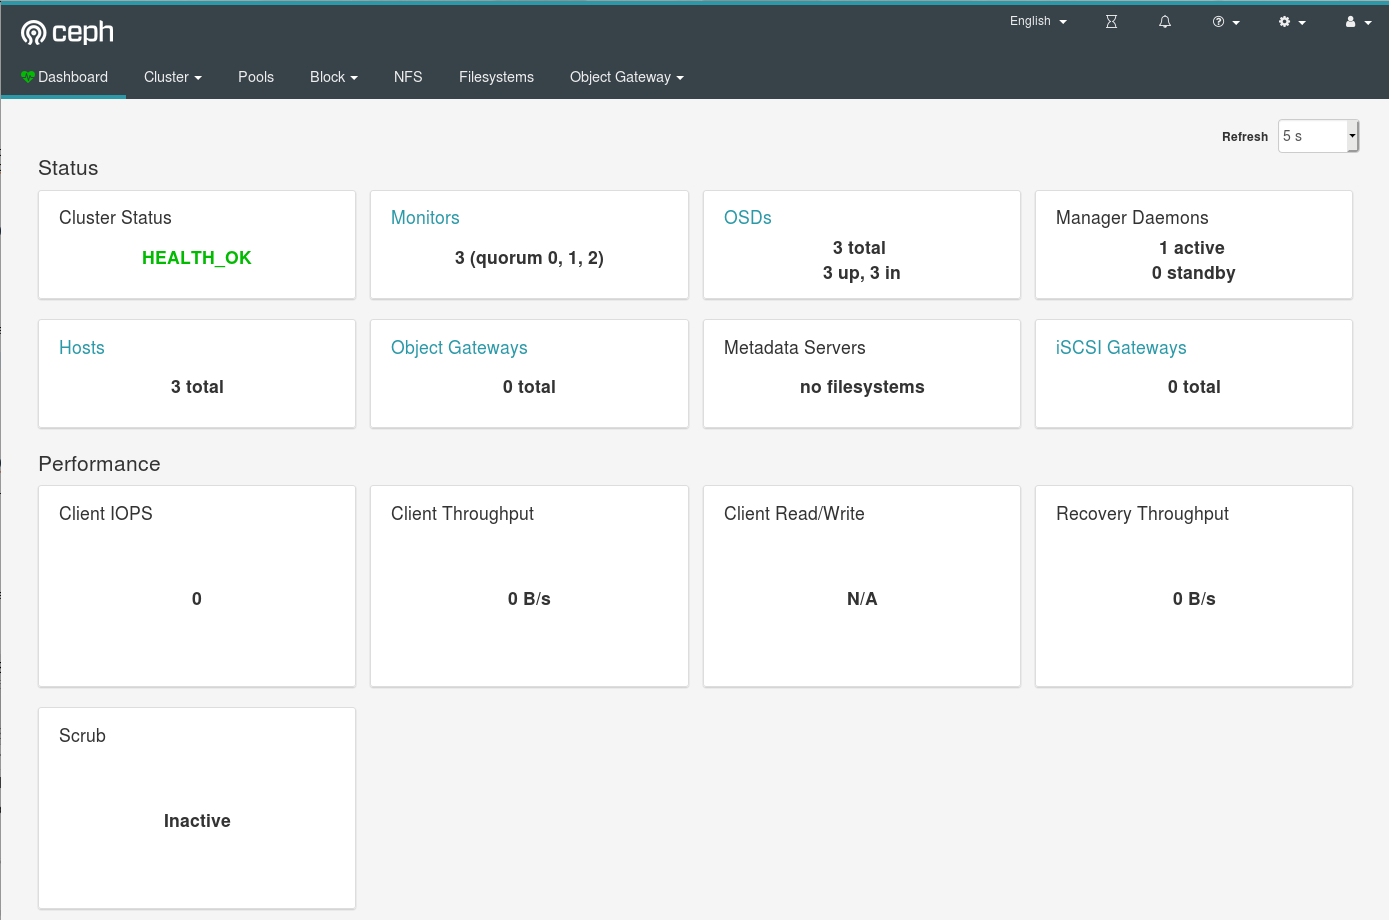
The Ceph Dashboard
Ceph comes with a nice web based dashboard allowing you to control your cluster from a web browser. Install the dashboard on one of your cluster nodes:
$ sudo ceph-mgr-dashboardTo enable the dashboard connect to on of your cluster nodes and run:
$ sudo ceph mgr module enable dashboardThe dashboard is secured with SSL/TLS by default. To get the dashboard up and running quickly, you can generate and install a self-signed certificate using the following built-in command:
$ sudo ceph dashboard create-self-signed-certIn order to be able to log in, you need to create a user account and associate it with at least one role. To create a user with the administrator role you can use the following commands:
$ sudo ceph dashboard ac-user-create <username> <password> administratorYou can now access the dashboard now form the your webbrowser
https://node-1:8443/
To disable the dashboard run:
$ sudo ceph mgr module disable dashboardYou will find much more information about the Ceph dashboard in the official ceph documentation.