This is just a short collection of Git commands and tricks which I personally did not always remember.
Create a new Tag
To create and push a new tag:
1.) List current tags
$ git tag
2.) Create a new Tag
$ git tag -a <TAG-VERSION> -m "next release"
3.) Push tag
By default, the git push command doesn’t transfer tags to remote servers. You will have to explicitly push tags to a shared server after you have created them.
$ git push origin <TAG-VERSION>
Create a Branch
To list all existing branches:
$ git branch
to create a new local branch
$ git branch <branch>
and checkout it with
$ git checkout <branch>
to push the branch to the remote repo
$ git push origin <branch>
Merge a Branch
Merge another branch into the current (e.g. into the master branch)
List all the branches in your local Git repository using the git branch command:
$ git branch
The output shows all branches and marks the current branch with an *.
Ensure you are on the branch you want to merge into. To switch to the master branch:
$ git checkout master
Now you can start merging. Since merging is a type of commit, it also requires a commit message.
Sometime you may forget to pull before you start working on something. Later you can not push your commit directly if a colleague has worked on some other artifacts. In this case you can do pull --rebase. This will resolve the conflict in most cases.
$ git pull --rebase
In any case if your pull produces a merge conflict you still will be warned by git.
Git: pull.rebase – Fast-forward
By default, git pull uses a merge strategy. This can cause issues when you try to push your changes while a colleague has already pushed commits to the same branch – even if the changes don’t conflict at all. Your push gets rejected, and you have to manually pull and merge first.
Setting pull.rebase=false changes the behavior of git pull to automatically merge the remote changes into your local repo.
To enable it globally:
$ git config --global pull.rebase false
This applies to all Git tools – whether you use the terminal, VS Code, Eclipse, or any other IDE.
Exception handling is a tedious but necessary job during development of modern web applications. And it’s teh same for Jakarta EE 10. But if you migrate an existing application to the new Jakarta EE 10 things have change a little bit and so it can happen that you old errorHandler does no no longer work. At least this was the case when I migrated Imixs-Office-Workflow to Jakrata EE 10. So in this short tutorial I will briefly explain how to handle JSF Exceptions.
First of all you need an exeptionHandler extending the Jakarta EE10 ExceptionHandlerWrapper class. The implementation can look like this:
This wrapper overwrites the default ExceptionHandlerWrapper. In the method handle() (which is the imprtant one) we search the root cause of the exception and put some meta information into the JSF flash scope. The flash is a memory that can be used by the JSF page we redirect to – ‘errorhandler.xhtml’
Next you need to create a custom ExceptionHanlderFactor. This class simple registers our new ExceptionHandler:
import jakarta.faces.context.ExceptionHandler;
import jakarta.faces.context.ExceptionHandlerFactory;

public class MyExceptionHandlerFactory extends ExceptionHandlerFactory {
    public MyExceptionHandlerFactory(ExceptionHandlerFactory wrapped) {
        super(wrapped);
    }

    @Override
    public ExceptionHandler getExceptionHandler() {
        ExceptionHandler parentHandler = getWrapped().getExceptionHandler();
        return new MyExceptionHandler(parentHandler);
    }

}
The new Factory method need to be registered in the faces-config.xml file:
And finally we can create a errorhandler.xhtml page that displays a user friendly error message. We can access the flash memory here to display the meta data collected in our ErrorHandler.
<ui:composition xmlns="http://www.w3.org/1999/xhtml"
	xmlns:c="http://xmlns.jcp.org/jsp/jstl/core"
	xmlns:f="http://xmlns.jcp.org/jsf/core"
	xmlns:h="http://xmlns.jcp.org/jsf/html"
	xmlns:ui="http://xmlns.jcp.org/jsf/facelets"
	template="/layout/template.xhtml">
	<!--
		Display a error message depending on the cause of a exception
	 -->
	<ui:define name="content">
	  <h:panelGroup styleClass="" layout="block">
				<p><h4>#{flash.keep.type}: #{flash.keep.message}</h4>
		<br />
		<strong>Exception:</strong>#{flash.keep.exception}
		<br />
		<strong>Error Code:</strong>
		<br />
		<strong>URI:</strong>#{flash.keep.uri}
		</p>
		<h:outputText value="#{session.lastAccessedTime}">
			<f:convertDateTime pattern="#{message.dateTimePatternLong}" timeZone="#{message.timeZone}"
							type="date" />
		</h:outputText>
	<h:form>
	  <h:commandButton action="home" value="Close"
		immediate="true" />
	</h:form>
  </h:panelGroup>
  </ui:define>

</ui:composition>
That’s it. You can extend and customize this to you own needs.
With the ODF Toolkit you got a lightweight Java Library to create, search and manipulate Office Document in the Open Document Format. The following tutorial will show some examples to find and replace parts of text and spreadsheet documents.
Maven
You can add the ODF Toolkit to your Java project with the following Maven dependency:
Note: Since version 0.12.0 new methods where added which I will explain in the following examples.
Text Documents
To find and replace parts of ODF text document you can use the class TextNavigation. The class allows you to search with regular expression in a text document and navigate through the content.
The following example show how to find all text containing the names ‘John’ or ‘Marry’ and replace the text selection with ‘user’:
Very large companies often tend to hire very large IT consulting firms to solve their IT problems. Often with moderate success. You can observe this all over the world when you read about failed big IT projects.
So why is this happening? Large IT consulting firms are perfect at telling you that they are the only ones able to solve your problem quickly and reliably. Typically, they also have a real expert who recognizes the problem very well and has an idea of a working solution. You should memorize this person’s face well, because you may never see this expert again. And he probably won’t be the one to solve your problem.
But what exactly is happening here? Why should an international big IT consulting company not be the right expert for your IT problem? To understand this, you simply think about the business model of such companies. It consists of selling you IT services at a fixed daily or hourly rate. This means that the more hours you buy, the better it is for the consulting firm. In order to further maximize profits, these companies are often looking for teams consisting of young enthusiastic university graduates. Typically in a completely different place in the world, where much lower wages are paid. It may be that you are lucky and you find an expert able to solve your problem. But it can also happen that he is confronted with this problem for the first time in his life.
So, now you have an international IT team managed by a large consulting firm and you may continue to have your original IT problem for a very long time. How can you solve this situation in a better way? It’s basically quite simple. Just take a look at the open source community. For every problem in IT, there is someone who deals with it. And if he or she makes the problem public and also publishes his proposed solution, then that’s your IT expert! If the problem is big enough, it may happen that the open source project grows a little. This means that there are now more than one experts able to solve your problem. You will save yourself a lot of money and time if you try to solve your IT problems in this way in the future.
So the biggest problem for you is actually only to find these IT experts in the open source community. However, you should not hire a large IT consulting company to search for such experts. If you’re wondering why – just read this article again from the beginning.
I have had the problem that I can’t connect a new SoundCore speaker device to my notbook running Debian. The problem was that the Bluetooth device was detected, but when I tried to connect it immediatly disconnected.
After a long trail and error the solution was simple:
When I started with the Application Server Glassfish years ago I used to configure the Server always directly in the domain.xml file. This is the file containing the configuration and all your customizations when you configure your Glassfish form the Web Admin Interface. The same is true for Payara Server which is more widespread in projects today. (The main different from Glassfish to Payara is, that Payara offers support where Glassfish is the reference implementation for Jakarta EE).
I’ve never gotten rid of my habit of configuring the server directly in the domain .xml, although there is a command-line tool called ‘asadmin‘ for doing the configuration. When you run you projects in Docker you even can copy the domain.xml into a Payara Docker image as you will do with your application. But these days I learned that this is a clumsy and impractical way to do this. The problem with tweaking the domain.xml directly is that you can miss some important XML tags or new coniguration details. So using the asadmin tool is more stable also over differnt versions of Payara.
Docker and asadmin
To configure the Payara Sever directly in your Dockerfile can be done easily when you use so called Preboot and Postboot commands. This are asadmin commands which can be placed in separate files.
So simply create two files called post-boot-commands.asadmin and pre-boot-commands.asadmin and copy these files into your custom Payara Docker image using the COPY command in your Dockerfile:
FROM payara/server-full
# add configuration files
USER root

# Preconfigure Resources
COPY ./my-scripts/preboot-commands.asadmin $POSTBOOT_COMMANDS
COPY ./my-scripts/post-boot-commands.asadmin $POSTBOOT_COMMANDS
RUN chown payara $POSTBOOT_COMMANDS

## Copy additional deployments here
## e.g. Postgres Driver
COPY ./my-scripts/postgresql-42.2.5.jar /opt/payara/paasDomain/lib/
...
USER payara
The Preeboot and Postboot scripts can contain any asadmin command to configure your server. For example to configure a JDBC Database Pool for Postgres the command will look like this:
# Create the JDBC connection pool for Postgres:
create-jdbc-connection-pool --datasourceclassname=org.postgresql.ds.PGSimpleDataSource --restype=javax.sql.DataSource --property user=${ENV=POSTGRES_USER}:password=${ENV=POSTGRES_PASSWORD}:Url=${ENV=POSTGRES_CONNECTION} my-database

# Create the JDBC resource:
create-jdbc-resource --connectionpoolid my-database jdbc/my-database
The Payara server will automatically execute the PreBoot and PostBoot scripts during startup and creates the configuration. In case your command is wrong or misspelled you will see the error message in the log file directly in the log file.
That’s it. Now you have a stable configuration setup for a Payara Docker Image that you can easily adapt to the latest version of Payara by simply upgrading the payara version in your Dockerfile.
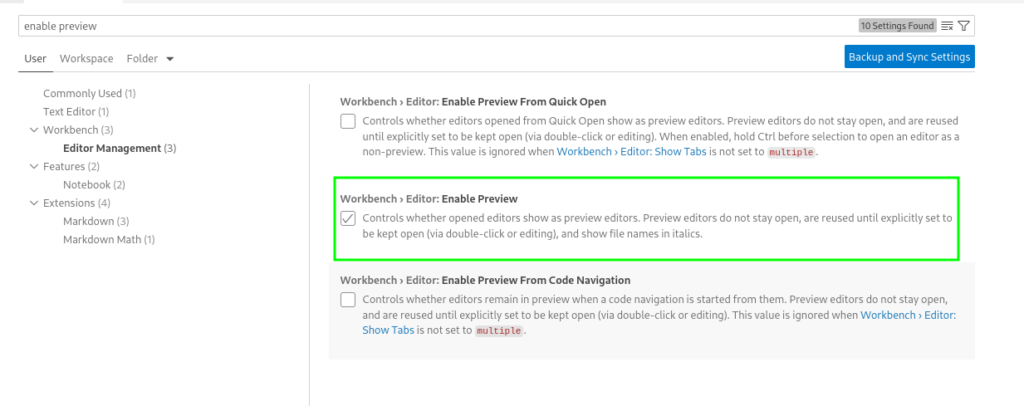
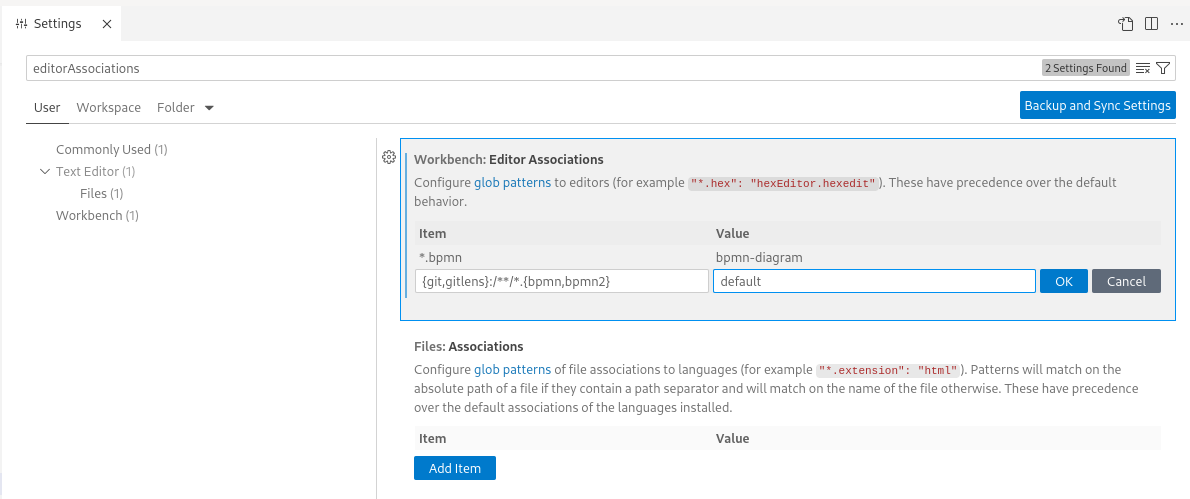
To disable to annoying feature that files will only open in a ‘preview’ mode instead each in a new Tab you can disable this featrue in settings:
Clean and Rebuild Java Projects
In some situations it may be helpful to rebuild all Java projects in your workspace
Java: Clean Java Language Server Workspace
Debug Jakarta EE Server
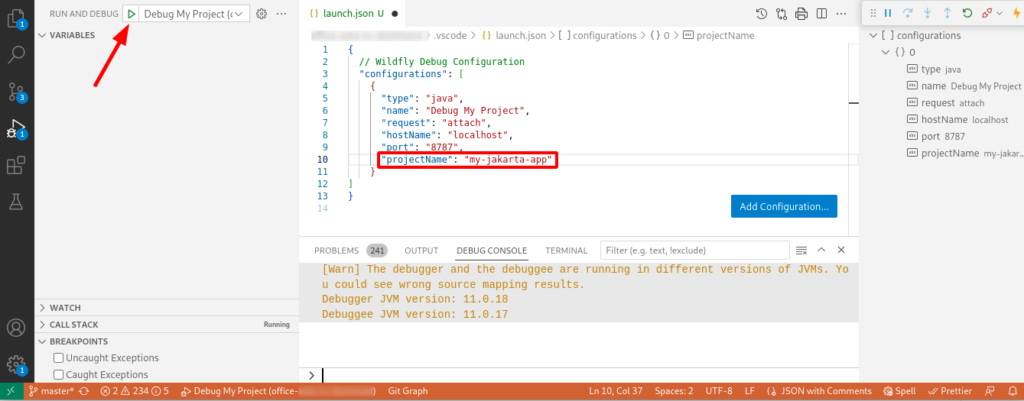
To use the Java Debugger to debug your code running in a Jakarta EE (or any Web Server) you need to create a so called launch-configuration first. Create or edit the project file .vscode/launch.json and add a configuration pointing to your remote server and project. The following example shows a configuration for Wildfyl in a project called ‘my-jakarta-app’
After creating the debug configuration you can launch the debugger:
Note: It is important that you enter the correct ‘projectName‘. If not, the debugger will not detect your sources correctly. You can see that the debug configuration is correct when the debug console print out something.
Appearance
Maybe it’s me who just gets too old, but I customize some appearance setting in vs-code to be able to work faster.
changing the ‘Tree indent’ in the Workbench Appearance from 8 to 16
SSH Key – Github Pull hangs…
In case you run into a scenario that your build-in git pull command within VSCode hangs forever, this may be an issue related to the ssh-agent (find background here).
You can test if yoru ssh-agent is running (which is necessary for VSCode) by checking the following command in a terminal:
$ ssh-add -l
The agent has no identities.
The result here shows, that not SSH IDs are available and this causes the hang in VSCode.
To solve such a situation, you can open a Terminal and enter
$ eval `ssh-agent`
$ ssh-add
This will promt you for the password of your ssh private key and register the ssh-agent with the SSH id. Now you can start VSCode:
$ code
This way VSCode will inherit the environment variables it needs to get key services from ssh-agent, and therefore will not prompt for your passphrase so long as the ssh-agent process continues running.
To automate this you can add the following script into your ~/.bashrc or ~/.bash_profile file:
if [ -z "$SSH_AUTH_SOCK" ]; then
   # Check for a currently running instance of the agent
   RUNNING_AGENT="`ps -ax | grep 'ssh-agent -s' | grep -v grep | wc -l | tr -d '[:space:]'`"
   if [ "$RUNNING_AGENT" = "0" ]; then
        # Launch a new instance of the agent
        ssh-agent -s &> .ssh/ssh-agent
   fi
   eval `cat .ssh/ssh-agent`
fi
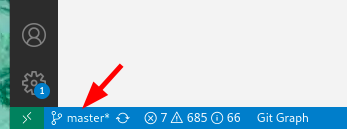
If you open your workspace and see a message “Select a workspace folder to migrate” this can be caused by the Extension GitHub Copilot app modernization.
Try disabling the GitHub Copilot extension to avoid this popup.