Just a short collection of tricks working with Theia IDE.
Auto Format Files
Check that the ‘formatOnSave’ is set to ‘true’
"editor.formatOnSave": true
Flighty explorer
If you observe the problem that after starting Theia IDE your explorer is permanently refreshing if if you do not change any files and is always changing the scroll position automatically, than this can be missing exclusion of file types from the file file watcher. Just extend the list of unimportant files like my list below:
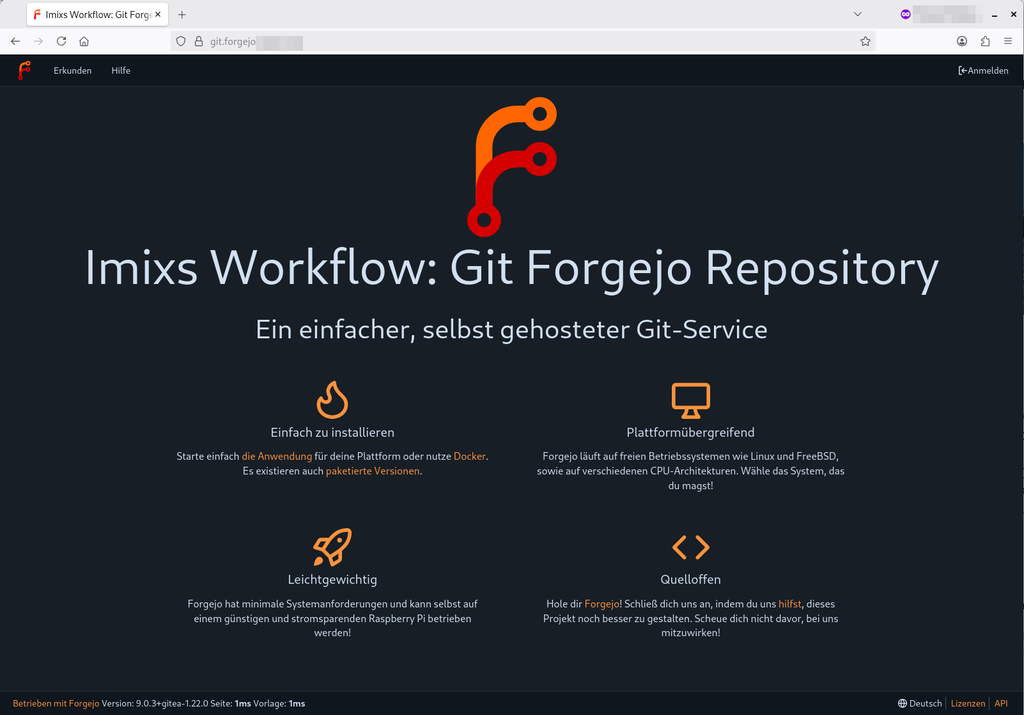
In this short tutorial I will explain how to deploy Forgejo into a Kubernetes Cluster. Forgejo is a self-hosted lightweight source code management solution based on Git. Forgejo is a good alternative to Github if you want to host your own Git Repository server.
Forgejo was founded in 2022 as a fork of the Gitea project. In the meantime it becomes a noteable an relevant Open Source alternative to Github. The project is community driven and maintained by the Codeberg e.v. If you have an open source project you can host your project directly on codeberg.org . For private repositories you can install your own instance of Forgejo.
There are several ways how you can install Forgejo. As it is provided as a Docker Image you can easily start the system with docker compose. See the official documentation.
If you have a Kubernets cluster it is easy to setup a production ready deployment of Forgejo. I assume that you are familiar with Kubernetes (see also my Kubernetes Setup Project Imixs-Cloud on Gihub ) and I assume you have some kind of storage solution and ingress solution already installed.
I split the deployment into two parts, each with a separate deyployment .yaml file
Database – 010-postgresql.yaml
Git Repo – 020-forgejo.yaml
The Database
For productive environments it is recommanded to replace the build in SQLLight database with MySQL or Postgres. For a kubernetes deployment this is the recommanded way. In the following deployment example I deploy a postgreSQL database for forgejo
This deplyoment is quite easy and assumes that you have a storage solution (in this example a ceph cluster) to provide a data volume for the postgresql service.
The Git Repo
The second part of our deployment is the forgejo service – providing the git repo and the web applicaiton. Also here we need a data volume for the git repository and configuration and also a ingers network to access the application via HTTPS.
As you can see from the configuraiton I disabled self-registration. To set the default admin password you can ssh the running forgejo container and run the following shell command:
su git -c "forgejo admin user create --username my-admin --password 'xxxxx' --email admin@foot.com --admin"
This will create you first admin user to login to the dashboard.
Network Access
In my deployment I use only HTTPS and disabled the SSH port 22 that is also exposed by Forgejo. But depending on your Kubernetes architecture you possible may not expose port 22. I think it is not necessary at all as the HTTPS support is very comfortable in Forgejo using API access tokens.
Conclusion
That’s it. As you can see to run Forgejo in a Kubernetes cluster is easy to achiv. If you have comments or additional ideas – let me know!
WordPress is powerful. Maybe too powerful. If all you want is a clean blog or a product landing page, you quickly find yourself fighting plugin sprawl, sluggish load times, and an admin interface designed for agencies – not for people who just want to write.
I looked around for alternatives and landed on Ghost. Open source, MIT license, modern editor, and most importantly: no overhead. Here is how I set it up.
In this blog post I explain the setup of a application running on Wildfly 29 using the OIDC authentication mechanism. It took me a long time to figure out the correct and necessary configuration steps. My requirement was not only to authenticate a user with Keycloak via OpenID Connect (OIDC), but also enable my backend services to authenticate programmatically to access the Rest API.
So we have two requirements: User login via Keycloak/OIDC and a programmatically login for backend service. The later is called Bearer Authentication mechanism.
Bearer Token Authentication
The Bearer Token Authorization is the process of authorizing HTTP requests through a valid Bearer Token. Such a token can be obtained from a Identity Authority like Keycloak using a simple curl command. For example to get a valid token from a Keycloak server you can run:
The interesting one is the ‘access_token’. You can copy this part and now you can request a secured resource from your applications Rest API:
curl -X GET \
  -H "Authorization: Bearer eyyyyyyyyyyyyyyyyyy" \
  "https://my-app/api/documents/ABC"
OK, this all sounds very easy and straight forward. But due to the fact that this security mechanisms evolving fast also in wildfly there were differnet concepts used in the past. So the following will work for Wildfly 29 (and hopefully later) version.
The Wildfly Descriptor ‘oidc.json’
An easy and very fast setup is to use the Wildfly specific deployment descriptor file ‘oidc.json‘. This file is placed in /WEB-INF/ directory:
No further configuration is needed. No realms need to be configured at all in the standalone.xml or in your application.
The Jakarta OpenIdAuthenticationMechanismDefinition
Jakarta EE 10 includes a new authentication mechanism: OpenID Connect! This can be added to a Jakarta EE servlet using the new @OpenIdAuthenticationMechanismDefinition annotation.
This annotation is the standarized way to use OIDC authentication mechanism. You need to implement a CDI security bean in your application like shown in the following example:
import jakarta.enterprise.context.RequestScoped;
import jakarta.enterprise.event.Observes;
import jakarta.inject.Inject;
import jakarta.security.enterprise.authentication.mechanism.http.OpenIdAuthenticationMechanismDefinition;
import jakarta.security.enterprise.identitystore.openid.AccessToken;
import jakarta.security.enterprise.identitystore.openid.OpenIdContext;
import jakarta.ws.rs.GET;
import jakarta.ws.rs.Path;
import jakarta.ws.rs.Produces;
import jakarta.ws.rs.core.MediaType;

@RequestScoped
@Path("/oidc")
@Produces({ MediaType.TEXT_PLAIN })
@OpenIdAuthenticationMechanismDefinition( //
        clientId = "${oidcConfig.clientId}", //
        clientSecret = "${oidcConfig.clientSecret}", //
        redirectURI = "${baseURL}/callback", //
        providerURI = "${oidcConfig.issuerUri}" //
)
public class Securitybean implements Serializable {
    private static final long serialVersionUID = 1L;

    @Inject
    Principal principal;

    @Inject
    private OpenIdContext context;

    @GET
    @Produces("text/plain")
    public String sessionInfoAuth() {
        String message = "";
        try {
            System.out.println("=========================================");
            if (principal != null) {
                System.out.println("  Principal name: " + principal.getName());
            } else {
                System.out.println("  Principal resolved to null!");
            }
            // Here's the unique subject identifier within the issuer
            if (context == null) {
                message = "Failed to resolve OpenIdContext!";
            } else {
                System.out.println("  Subject = " + context.getSubject());
                System.out.println("  Access token = " + context.getAccessToken());
                System.out.println("  ID token = " + context.getIdentityToken());
                System.out.println("  Claims json = " + context.getClaimsJson());
                System.out.println("=========================================");
                message = "Imixs-Security-OIDC ==> OK \n" + //
                        "User Principal      ==> " + principal.getName()
                        + "\n\nSession details are available on server log";
            }
        } catch (Exception e) {
            message = "Failed to resolve OpenIdContext!";
        }
        return message;
    }
}
The important part is only the annotation. I added the method sessionInfoAuth only for convenience to provide a rest API to check the auth information.
Using this mechanism it is important to disable the integrated-jaspi module in your standalone.xml file:
The problem is, that with this setup you can login as a user like before with the oidc.yaml file, but a programmatic login with the access token is no longer possible.
If you find an solution for this problem, please let me know 😉
In the following I show an example how you can upgrade an old PostgreSQL server to a new Major version running in a Kubernetes cluster. In this example I upgrade directly from 9.6.1 to 17.4. My deployment runs on Kubernetes and I have external data volumes bound to my servers based on a ceph system. The migration concept in short is the following:
Mount a new /backup/ volume to backup the data on the old databasesever
Backup the existing database with pg_dump
Undeploy your old PostgreSQL Server
Create a new deployment for the new empty Server and mount the /backup/ volume
In this blog post I will try to explain how to replace Jakrata EE EJBs with CDI beans. In onw of the future releases of Jakarta EE (possible version 12) the EJB concepts will be fully replaced by CDI technology. The reason simply is that EJBs become more and more outdated as the technology is based on older concepts that today are no longer recommended. Another goal for the replacement is to make developers life easier and not providing two very similar technologies in parallel. The Imixs-Workflow project is fully based on Jakarta EE and we are using also EJBs in some of its core components. So this will also be a kind of travel guide of my own journey from EJB to CDI.
The Basics
So first question: Why will EJBs be removed? The first and most obvious answer is: it does not make sens for the Jakarta EE project to support tow similar technologies in parallel. CDI is the newer technology and already today provides a lot of concepts from EJBs. So often in a Jakrata EE project you can either choose to implement a Service in a EJB or CDI bean without any difference in its result.
One of the more hidden reasons is that EJBs were invented at a time when the Java VM did not yet offer the performance and functionality that it does today. At that time, it was simply not efficiently possible to use a bean instance in a multi-threaded situation without running into a problem with the VMs garbage collector that it could no longer keep up cleaning old objects. The was the reason for the EJB Container and its pooling mechanism. That means in EJB a client always gets an EJB instance exclusive and can use it in a thread save way. If all EJBs from the pool are in use a new client request have to wait until one of the pools EJB instances is free again. This was and is a very robust and thread save mechanism and makes the developers life very easy. In a CDI Container we don’t have this kind of pooling and so the first result is the different code layout of CID implementations.
An EJB implementation typical looks like this:
package com.example;

import jakarta.ejb.EJB;
import jakarta.ejb.Stateless;
import jakarta.ejb.TransactionAttribute;
import jakarta.ejb.TransactionAttributeType;
import jakarta.persistence.EntityManager;
import jakarta.persistence.PersistenceContext;

@Stateless
public class StatelessBeanInEJB {

  @PersistenceContext
  private EntityManager entityManager;

  // The @TransactionAttribute(TransactionAttributeType.REQUIRED) // annotation is optional; this is the default already.
  public void transactionalMethod() {
   // ...
  }


  @TransactionAttribute(TransactionAttributeType.REQUIRES_NEW)
  public void independentTransactionalMethod() {
   // ...
  }


}
Now this is how the same looks in CDI with help of the in Jakarta Transactions 2.0:
package com.example;

import jakarta.enterprise.context.ApplicationScoped;
import jakarta.persistence.EntityManager;
import jakarta.persistence.PersistenceContext;
import jakarta.transaction.Transactional;
import jakarta.transaction.Transactional.TxType;

@ApplicationScoped
public class StatelessBeanInCDI {

  @PersistenceContext
  private EntityManager entityManager;

  @Transactional // The annotation value TxType.REQUIRED is optional; this is the default already.
  public void transactionalMethod() {
   // ...
  }

  @Transactional(TxType.REQUIRES_NEW)
  public void independentTransactionalMethod() {
   // ...
  }


}
The CDI bean has been marked @ApplicationScoped and is no longer pooled. And the CDI instances are unsynchronized while EJB instances are synchronized.
Synchronized vs Unsynchronized – Was does this mean?
I’ll explain the important difference between synchronized EJB instances and non-synchronized CDI instances:
EJB (@Stateless) – synchronized:
With EJBs, each bean instance from the pool is only used by one thread at a time
The container automatically ensures this thread safety
If several threads want to access the bean at the same time, they have to fetch a free instance from the pool or wait
This makes implementation easier because you don’t have to worry about thread safety. However, it can lead to performance degradation under high load because threads have to wait.
CDI (@ApplicationScoped) – unsynchronized:
A CDI Bean instance can be used by multiple threads in parallel
There is no automatic synchronization by the container
The developer is responsible for thread safety
This allows for better performance under high load, as no threads have to wait. However this requires a more careful implementation to avoid race conditions.
Here is an example:
@ApplicationScoped
public class UnsynchronizedCounter {
    private int count = 0; // shared state

  // NOT thread-save!
  public void increment() {
  count++;  // can lead into a Race Condition
  }

  // Thread-save Version
  public synchronized void incrementThreadSafe() {
   count++;
  }
}
So with CDI, we have to pay attention to thread safety ourselves if the bean has shared state. Possible solutions are:
Using Synchronized Methods/Blocks
Use thread-safe data structures (e.g. AtomicInteger)
Working stateless
Use a narrower scope like @RequestScoped
The EJB version would automatically be thread-safe, but less performant under high load.
Using instance variables in stateless EJBs was always a very bad practice but is was possible. So if you have clean implementations of EJBs without using instance variables, on the first glance it should be easy to transfere your EJB into a CID bean by just replacing the annotation @Stateless with @ApplicationScoped.
But now let’s take a deeper look into the details….
On Linux servers you sometimes have to switch to the superuser (su). The user has privileged rights and thing can got mad if you are not aware if you are currently working as a ‘normal’ user or a superuser. To make this situations more obvious in a Linux shell, you can add colors to your BASH Prompt.
You simply have to edit the file ~/.bashrc on Debian systems. For a normal user add this code block:
# uncomment for a colored prompt, if the terminal has the capability; turned
# off by default to not distract the user: the focus in a terminal window
# should be on the output of commands, not on the prompt
force_color_prompt=yes
if [ -n "$force_color_prompt" ]; then
    if [ -x /usr/bin/tput ] && tput setaf 1 >&/dev/null; then
        # We have color support; assume it's compliant with Ecma-48
        # (ISO/IEC-6429). (Lack of such support is extremely rare, and such
        # a case would tend to support setf rather than setaf.)
        color_prompt=yes
    else
        color_prompt=
    fi
fi

if [ "$color_prompt" = yes ]; then
    PS1='${debian_chroot:+($debian_chroot)}\[\033[01;32m\]\u\[\033[01;34m\]@\[\033[01;36m\]\h\[\033[01;33m\]\w\[\033[01;35m\]\$ \[\033[00m\]'
else
    PS1='${debian_chroot:+($debian_chroot)}\u@\h:\w\$ '
fi
unset color_prompt force_color_prompt
And for the root user (/root/.bashrc) change the color settings like this:
# uncomment for a colored prompt, if the terminal has the capability; turned
# off by default to not distract the user: the focus in a terminal window
# should be on the output of commands, not on the prompt
force_color_prompt=yes

if [ -n "$force_color_prompt" ]; then
    if [ -x /usr/bin/tput ] && tput setaf 1 >&/dev/null; then
        # We have color support; assume it's compliant with Ecma-48
        # (ISO/IEC-6429). (Lack of such support is extremely rare, and such
        # a case would tend to support setf rather than setaf.)
        color_prompt=yes
    else
        color_prompt=
    fi
fi

if [ "$color_prompt" = yes ]; then
    PS1='${debian_chroot:+($debian_chroot)}\[\033[01;31m\]\u\[\033[01;34m\]@\[\033[01;36m\]\h\[\033[01;33m\]\w\[\033[01;35m\]\$ \[\033[00m\]'

else
    PS1='${debian_chroot:+($debian_chroot)}\u@\h:\w\$ '
fi
unset color_prompt force_color_prompt
That’s it. Now you have a red marker if you are logged in as a superuser and a green marker if you are working as a normal user:
LLM stands for Large Language Model and is a large-scale AI model that has been trained with an extensive amount of text and code. Beside the well known and widespread Chat GPT, today there are many powerful Open Source alternatives available. The advantage of an Open Source LLM is that you can use such a model in your own application within your own environment. There is no dependency on an external service provider that can raise prices, shut down services, or remove models.
But the question that inevitably arises is: Where to start? At least that’s the question I asked myself. After some research I found out that it isn’t such difficulty as it sounds to run a local LLM.
First of all there is a place called Hugging Face providing a kind of market place for all kinds of AI models. After you have registers yourself on the page you can search and download all kinds of different Models. Of course each model is different and addresses different needs and requirements. But the good news is that there is a kind of common open standard to run a LLM called LLaMA CCP. Lamma CCP allows you to run a LLM with minimal setup and state-of-the-art performance on a wide variety of hardware – locally and in the cloud. And of course there is also a Python binding available. And this makes is easy to test a LLM in a Docker container.
This is just a short collection of Git commands and tricks which I personally did not always remember.
Create a new Tag
To create and push a new tag:
1.) List current tags
$ git tag
2.) Create a new Tag
$ git tag -a <TAG-VERSION> -m "next release"
3.) Push tag
By default, the git push command doesn’t transfer tags to remote servers. You will have to explicitly push tags to a shared server after you have created them.
$ git push origin <TAG-VERSION>
Create a Branch
To list all existing branches:
$ git branch
to create a new local branch
$ git branch <branch>
and checkout it with
$ git checkout <branch>
to push the branch to the remote repo
$ git push origin <branch>
Merge a Branch
Merge another branch into the current (e.g. into the master branch)
List all the branches in your local Git repository using the git branch command:
$ git branch
The output shows all branches and marks the current branch with an *.
Ensure you are on the branch you want to merge into. To switch to the master branch:
$ git checkout master
Now you can start merging. Since merging is a type of commit, it also requires a commit message.
Sometime you may forget to pull before you start working on something. Later you can not push your commit directly if a colleague has worked on some other artifacts. In this case you can do pull --rebase. This will resolve the conflict in most cases.
$ git pull --rebase
In any case if your pull produces a merge conflict you still will be warned by git.
Git: pull.rebase – Automatic Rebase on Pull
By default, git pull uses a merge strategy. This can cause issues when you try to push your changes while a colleague has already pushed commits to the same branch – even if the changes don’t conflict at all. Your push gets rejected, and you have to manually pull and merge first.
Setting pull.rebase=true changes the behavior of git pull to automatically rebase you local commit on top of the remote changes
To enable it globally:
$ git config --global pull.rebase true
This applies to all Git tools – whether you use the terminal, VS Code, Eclipse, or any other IDE.