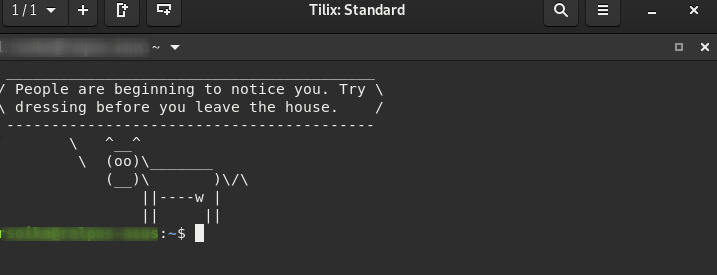
Start Your Debian Terminal with cowsay

Cowsay is a Linux tool drawing a cow with a bubble into your terminal.

To have more fun starting your bash you can add it into your bash configuration in Debian:

$ sudo apt-get install cowsay fortune

Next edit your ~/.bashrc file and add the following script at the end of this config file:

if [ -x /usr/games/cowsay -a -x /usr/games/fortune ]; then
    fortune | cowsay
fi

That’s it.

Debian – Bluetooth disconnects Sound Device

I have had the problem that I can’t connect a new SoundCore speaker device to my notbook running Debian. The problem was that the Bluetooth device was detected, but when I tried to connect it immediatly disconnected.

After a long trail and error the solution was simple:

$ sudo apt-get install pulseaudio-module-bluetooth
$ killall pulseaudio

Connected again – and it worked! Find background here.

Switching from containerd to cri-o

The last 3 days I tried to install kubernetes 1.25.4 on a Debian 11 (Bullseye) box without success. The problem was that the kubeadm init process always hangs with the message:

....
[wait-control-plane] Waiting for the kubelet to boot up the control plane as static Pods from directory "/etc/kubernetes/manifests". This can take up to 4m0s
I1121 08:17:12.320743    8096 round_trippers.go:466] curl -v -XGET  -H "Accept: application/json, */*" -H "User-Agent: kubeadm/v1.25.4 (linux/amd64) kubernetes/fdc7750" 'https://x.x.y.y:6443/healthz?timeout=10s'
I1121 08:17:12.321047    8096 round_trippers.go:508] HTTP Trace: Dial to tcp:x.x.y.y:6443 failed: dial tcp x.x.y.y:6443: connect: connection refused
....

Even as I tried several different tutorials and guidelines I failed to solve this issue. (See also here)

Using cri-o instead of containerd…..

Kuberentes supports different Container Runtimes. containerd is only one of them. Maybe containerd and Debian 11 are not the best friends. I don’t know…

cri-o is an alterative lightweight Container Runtime for Kubernetes. After I switched from containerd to cri-o everything worked like a charm. So here is my short guideline how to install cri-o on a fresh Debian 11 box.

Note: If you have already installed containerd you need to remove it first!

Install cri-o on Debian 11

As usual for kuberentes first make sure that you have enabled the necessary enable kernel modules and setup the iptables:

$ sudo modprobe overlay
$ sudo modprobe br_netfilter

$ sudo tee /etc/sysctl.d/kubernetes.conf<<EOF
net.bridge.bridge-nf-call-ip6tables = 1
net.bridge.bridge-nf-call-iptables = 1
net.ipv4.ip_forward = 1
EOF

$ sudo sysctl --system

Next you need to add the repositories maintained by opensuse.org:

$ sudo -i
$ OS=Debian_11
$ VERSION=1.23

$ echo "deb https://download.opensuse.org/repositories/devel:/kubic:/libcontainers:/stable/$OS/ /" > /etc/apt/sources.list.d/devel:kubic:libcontainers:stable.list
echo "deb http://download.opensuse.org/repositories/devel:/kubic:/libcontainers:/stable:/cri-o:/$VERSION/$OS/ /" > /etc/apt/sources.list.d/devel:kubic:libcontainers:stable:cri-o:$VERSION.list

$ curl -L https://download.opensuse.org/repositories/devel:kubic:libcontainers:stable:cri-o:$VERSION/$OS/Release.key | apt-key add -
$ curl -L https://download.opensuse.org/repositories/devel:/kubic:/libcontainers:/stable/$OS/Release.key | apt-key add -

Now you can start installing cri-o from the new repository:

$ sudo apt update
$ sudo apt-get install -y cri-o cri-o-runc
$ sudo apt-mark hold cri-o cri-o-runc

# Start and enable CRI-O
$ sudo systemctl daemon-reload
$ sudo systemctl enable crio --now

That’s it. To verify if your cri-o runtime is up and running call:

$ sudo systemctl status crio
● crio.service - Container Runtime Interface for OCI (CRI-O)
     Loaded: loaded (/lib/systemd/system/crio.service; enabled; vendor preset: enabled)
     Active: active (running) since Mon 2022-11-21 15:14:44 UTC; 21min ago
       Docs: https://github.com/cri-o/cri-o
   Main PID: 2372 (crio)
      Tasks: 12
     Memory: 770.4M
        CPU: 28.268s
     CGroup: /system.slice/crio.service
             └─2372 /usr/bin/crio

Nov 21 15:18:12 master-1 crio[2372]: time="2022-11-21 15:18:12.035184530Z" level=info msg="Created container 0878bbfc957e8a7fb069b83a9101c9386d0bee5ea14c10c81ea0379c14cd3240: kube>
Nov 21 15:18:12 master-1 crio[2372]: time="2022-11-21 15:18:12.038925952Z" level=info msg="Starting container: 0878bbfc957e8a7fb069b83a9101c9386d0bee5ea14c10c81ea0379c14cd3240" id>
Nov 21 15:18:12 master-1 crio[2372]: time="2022-11-21 15:18:12.049779604Z" level=info msg="Started container" PID=9385 containerID=0d50842810cb5a0632b137a16e1d29845f4dc3cb9e8e8fc3>
Nov 21 15:18:12 master-1 crio[2372]: time="2022-11-21 15:18:12.063878077Z" level=info msg="Started container" PID=9383 containerID=0878bbfc957e8a7fb069b83a9101c9386d0bee5ea14c10c8>
Nov 21 15:22:56 master-1 crio[2372]: time="2022-11-21 15:22:56.803994649Z" level=info msg="Checking image status: registry.k8s.io/pause:3.8" id=2521c53d-4b83-4b95-8501-363d83ac149>
Nov 21 15:22:56 master-1 crio[2372]: time="2022-11-21 15:22:56.804517064Z" level=info msg="Image status: &ImageStatusResponse{Image:&Image{Id:4873874c08efc72e9729683a83ffbb7502ee7>
Nov 21 15:27:56 master-1 crio[2372]: time="2022-11-21 15:27:56.810307321Z" level=info msg="Checking image status: registry.k8s.io/pause:3.8" id=4b38e75e-8e03-4007-8554-323eb6c404a>
Nov 21 15:27:56 master-1 crio[2372]: time="2022-11-21 15:27:56.810772581Z" level=info msg="Image status: &ImageStatusResponse{Image:&Image{Id:4873874c08efc72e9729683a83ffbb7502ee7>
Nov 21 15:32:56 master-1 crio[2372]: time="2022-11-21 15:32:56.814927245Z" level=info msg="Checking image status: registry.k8s.io/pause:3.8" id=ba81dd6e-491d-43ed-a114-5b69a980569>
Nov 21 15:32:56 master-1 crio[2372]: time="2022-11-21 15:32:56.815618456Z" level=info msg="Image status: &ImageStatusResponse{Image:&Image{Id:4873874c08efc72e9729683a83ffbb7502ee7

Now you can start init your kubernetes cluster:

$ sudo kubeadm init --pod-network-cidr=10.244.0.0/16 

Upgrade containerd.io/buster Breaks Kubernetes Master Node

Today I run into a strange situation after upgrading containerd.io on my Kubernetes master node. I am running kubeadm in version 1.21.6 and containerd.io in version 1.4.6. on a Debian Buster server. Everything was fine, until I did a apt upgrade which upgraded containerd.io/buster from version 1.4.6-1 to 1.4.11-1

After this upgrade my master node was no longer working and my Kubernetes cluster could not start. I saw log messages like this ones:

E1113 21:59:33.697509  649 kubelet.go:2291] "Error getting node" err="node \"master-1\" not found"
649 controller.go:144] failed to ensure lease exists, will retry in 7s, error: Get "https://node1-control-plane-endpoint:6443/apis/coordination.k8s.io/v1/namespaces/kube-node-lease/leases/tikal-master-1?timeout=10s": dial tcp 10.0.0.2:6443: connect: connection refused
649 reflector.go:138] k8s.io/client-go/informers/factory.go:134: Failed to watch *v1.Node: failed to list *v1.Node: Get "https://node1-control-plane-endpoint:6443/api/v1/nodes?fieldSelector=metadata.name%3Dmaster-1&limit=500&resourceVersion=0": dial tcp 10.0.0.2:6443: connect: connection refused

The problem seems to be discussed here. My only solution was to downgrade containerd.io back to version 1.4.6 which solved the problem for me:

$ sudo apt-get install containerd.io=1.4.6-1
$ sudo apt-mark hold containerd.io

With the apt-mark I marked containerd.io as a non upgradeable package which avoids automatic upgrades in the future. In general I recommend to mark also kubeadm and kubelet in this way:

$ sudo apt-mark hold containerd kubeadm kubelet kubectl

Upgrades of kubeadm and kubelet should be only done as explained in the Official Upgrade Guide.

Ceph Pacific running on Debian 11 (Bullseye)

In this tutorial I will explain how to setup a Ceph Cluster on Debian 11. The Linux Distribution is not as relevant as it sounds but for the latest Ceph release Pacific I am using here also the latest Debian release Bullseye.

In difference to my last tutorial how to setup Ceph I will focus a little bit more on network. Understanding and configuring the Ceph network options will ensure optimal performance and reliability of the overall storage cluster. See also the latest configuration guide from Red Hat.

Continue reading “Ceph Pacific running on Debian 11 (Bullseye)”

Kubernetes, Ceph and Static Volumes

Ceph is an open source distributed storage system which integrates with the concept of Kubernetes in a perfect way. With the Ceph CSI-Plugin you can connect a Ceph cluster into your Kubernetes cluster in a well designed way. In one of my last posts I give a short tutorial how to setup a Ceph cluster on Debian. Also take a look at the Imixs-Cloud project.

Static Persistence Volumes

When we talk about Kuberentes and Persistence Volumes often you will find examples working with a so called storage class and Dynamic Persistence Volumes. In this concept a persistence volume will be provisioned automatically by the Kubernetes CSI adapter and you do not need to think much about how this works. But this kind of persistence volumes are not durable which means, that if you delete your POD also the persistence volume will be removed and all the data you container wrote so far will be lost. To avoid this, you need a so called Static Persistence Volume. Such a persistence volume is marked with the flag ‘Retain’:

persistentVolumeReclaimPolicy: Retain

This means the volume will not be deleted when the POD is removed or updated.

To setup a Static Persistence Volume in Ceph, two steps are necessary. Fist you need to create the ceph image on you ceph cluster. This can be done form the ceph web admin interface or from the command line tool:

# rbd create test-image --size=1024 --pool=kubernetes --image-feature layering

Next you can define the corresponding Kubernetes Persistence Volume Object referring to this RBD image:

---
apiVersion: v1
kind: PersistentVolume
metadata:
  name: rbd-static-pv
spec:
  volumeMode: Filesystem
  storageClassName: ceph
  persistentVolumeReclaimPolicy: Retain
  accessModes:
  - ReadWriteOnce
  capacity:
    storage: 1Gi
  csi:
    driver: rbd.csi.ceph.com
    fsType: ext4
    nodeStageSecretRef:
      name: csi-rbd-secret
      namespace: ceph-system
    volumeAttributes:
      clusterID: "<clusterID>"
      pool: "kubernetes"
      staticVolume: "true"
      # The imageFeatures must match the created ceph image exactly!
      imageFeatures: "layering"
    volumeHandle: test-image 

Replace <clusterID> with the id of you ceph cluster. Note: also a storage class is needed here to identify the ceph nodes. Find more details here.

Resizing Static Persistence Volumes

So are everything is working fine using Ceph for static persistence volumes. But it becomes a little bit tricky if you need to resize an image. Imagine you are running a database and the calculated storage you need exceeds the size you planed in the beginning.

In this case you first need to resize the ceph image. This can be done easily form the Ceph web admin interface or from the command line tool.

# rbd resize --image foo --size 2048

But the problem is, that after you delete and redeploy your POD in Kubernetes it will still see the old disk size. This happens because the Ceph CSI Plugin did not support automatically resizing of static volumes.

If you are using the fsType ext4 (as in my example) you can run the resize2fs command from within your POD to give your container the correct new size:

# resize2fs /dev/rbd[number]

You need to replace [number] with the correct rbd image mounted within your POD. You can check the rdb number with the command df -h.

Note: The command will only work if the resize2fs lib is installed on your container (which is for example the case for the official PostgreSQL image). Also it is important for this command that your POD runs with the securityContext privileged=true :

....         
          volumeMounts:
            - name: volume-to-resize
              mountPath: /var/lib/data
          securityContext:
            privileged: true

Using a Kubernetes Job

As an alternative to executing the resize2fs command manually you can also start a simple Kubernetes job to resize your RBD images automatically.

---
###################################################
# This job can be used to resize a ext4 filesystem
# aligned to the given size of the underlying RBD image.
###################################################
apiVersion: batch/v1
kind: Job
metadata:
  name: ext4-resize2fs
spec:
  template:
    spec:
      containers:
        - name: debian
          image: debian

          command: ["/bin/sh"]
          args:
            - -c
            - >-
                echo '******** start resizeing block device  ********' &&
                echo ...find rbd mounts to be resized.... &&
                df | grep /rbd &&
                DEVICE=`df | grep /rbd | awk '{print $1}'` &&
                echo ...resizing device $DEVICE ... &&
                resize2fs $DEVICE &&
                echo '******** resize block device completed ********'

          volumeMounts:
            - name: volume-to-resize
              mountPath: /tmp/mount2resize
          securityContext:
            privileged: true
      volumes:
        - name: volume-to-resize
          persistentVolumeClaim:
            claimName: test-pg-dbdata
      restartPolicy: Never
  backoffLimit: 1

Make sure that the PV and PVC objects exist before you run the job. Replace the PVC with the name of your PVC to be resized.

$ kubectl apply -f resize2fs.yaml

If you have any comments please post them here.

Running Gitea on a Virtual Cloud Server

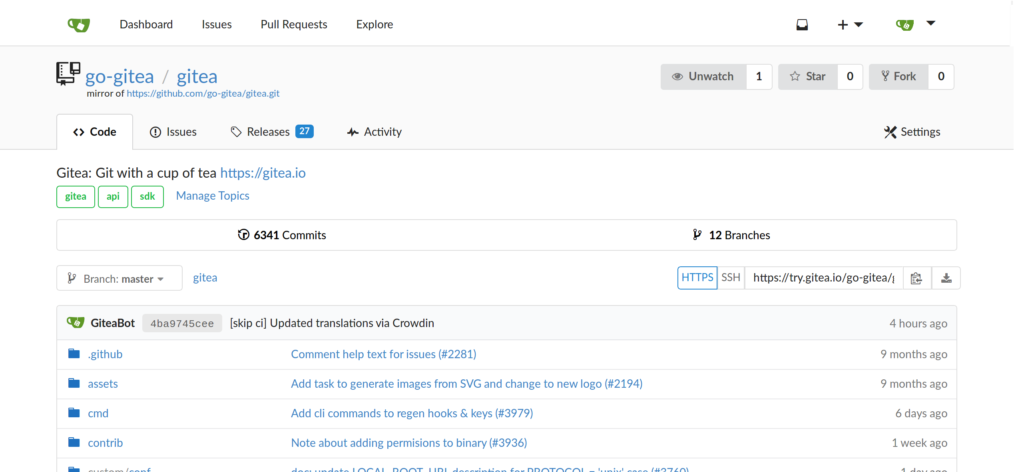
Gitea is an open source, self hosted git repository with a powerful web UI. In the following short tutorial I will explain (and remember myself) how to setup Gitea on single virtual cloud server. In one of my last posts I showed how to run Gitea in a Kubernetes cluster. As I am using git also to store my kubernetes environment configuration it’s better to run the git repo outside of a cluster. In the following tutorial I will show how to setup a single cloud node running Gitea on Docker.

Continue reading “Running Gitea on a Virtual Cloud Server”

NFS and Iptables

These days I installed a NFS Server to backup my Kubernetes Cluster. Even as I protected the NSF server via the exports file to allow only cluster members to access the server there was still a new security risk. NSF comes together with the Remote Procedure Call Daemon (RPC). And this daemon enables attackers to figure out information about your network. So it is a good idea to protect the RPC which is running on port 111 from abuse.

To test if your server has an open rpc port you can run a telnet from a remote node:

$ telnet myserver.foo.com 111
Trying xxx.xxx.xxx.xxx...
Connected to myserver.foo.com.

This indicates that rpc is visible from the internet. You can check the rpc ports on your server also with:

$ rpcinfo -p
   program vers proto   port  service
    100000    4   tcp    111  portmapper
    100000    3   tcp    111  portmapper
    100000    2   tcp    111  portmapper
    100000    4   udp    111  portmapper
    100000    3   udp    111  portmapper
    100000    2   udp    111  portmapper

Iptables

If you run Kubernetes or Docker on a sever you usually have already Iptables installed. You can test this by listing existing firewall rules. With the option -L you can list all existing rules:

$ iptables -L 
Chain INPUT (policy ACCEPT)
target     prot opt source               destination         

Chain FORWARD (policy DROP)
target     prot opt source               destination         
DOCKER-USER  all  --  anywhere             anywhere            
DOCKER-ISOLATION-STAGE-1  all  --  anywhere             anywhere            
ACCEPT     all  --  anywhere             anywhere             ctstate RELATED,ESTABLISHED
DOCKER     all  --  anywhere             anywhere            
ACCEPT     all  --  anywhere             anywhere            

Chain OUTPUT (policy ACCEPT)
target     prot opt source               destination         

Chain DOCKER (1 references)
target     prot opt source               destination         
ACCEPT     tcp  --  anywhere             172.17.0.2           tcp dpt:9042
ACCEPT     tcp  --  anywhere             172.17.0.2           tcp dpt:afs3-callback

Chain DOCKER-ISOLATION-STAGE-1 (1 references)
target     prot opt source               destination         
DOCKER-ISOLATION-STAGE-2  all  --  anywhere             anywhere            
RETURN     all  --  anywhere             anywhere            

Chain DOCKER-ISOLATION-STAGE-2 (1 references)
target     prot opt source               destination         
DROP       all  --  anywhere             anywhere            
RETURN     all  --  anywhere             anywhere            

Chain DOCKER-USER (1 references)
target     prot opt source               destination         
RETURN     all  --  anywhere             anywhere

This is an typical example you will see on a sever with Docker daemon installed. Beside the three default chains ‘INPUT’, ‘FORWARD’ and ‘OUTPUT’ there are also some custom Docker chains describing the rules.

So the goal is to add a new CHAIN containing rules to protect the RPC daemon from abuse.

Backup your Origin iptables

Before you start adding new rules make a backup of your origin rule set:

$ iptables-save > iptables-backup

This file can help you if something goes wrong later…

Adding a RPC Rule

If you want to use RPC in the internal network but prohibit it from the outside, then you can implement the following iptables. In this example I explicitly name the cluster nodes which should be allowed to use RPC port 11. All other request to the PRC port will be dropped.

Replace [SEVER-NODE-IP] with the IP address from your cluster node:

$ iptables -A INPUT -s [SERVER-NODE-IP] -p tcp --dport 111 -j ACCEPT
$ iptables -A INPUT -s [SERVER-NODE-IP] -p udp --dport 111 -j ACCEPT
$ iptables -A INPUT -p tcp --dport 111 -j DROP
$ iptables -A INPUT -p udp --dport 111 -j DROP

This rule explicitly allows SEVER-NODE-IP to access the service and all other clients will be drop. You can easily add additional Nodes before the DROP.

You can verify if the new ruleset was added to your existing rules with:

$ iptables -L

You may write a small bash script with all the iptables commands. This makes it more convenient testing your new ruleset.

Saving the Ruleset

Inserting new rules into the firewall carries some risk by its own. If you do something wrong you can lockout your self from your sever. For example if you block the SSH port 22.

The good thing is, that rules created with the iptables command are stored in memory. If the system is restarted before saving the iptables rule set, all rules are lost. So in the worst case you can reboot your server to reset your new rules.

If you have tested your rules than you can persist the new ruleset.

$ iptables-save > iptables-newruleset

After a reboot yor new rules will still be ignored. To tell debian to use the new ruleset you have to store this ruleset into /etc/iptables/rules.v4

$ iptables-save > /etc/iptables/rules.v4

Finally you can restart your server. The new rpc-rules will be applied during boot.
How to Set Timezone and Locale for Docker Image

When I deployed my java applications on the latest Wildfly Docker image I noticed a missing language support for German Umlaute and the timezone CET. So the question was: How can I change this general setting in a Docker container?

Verify Timezone and Language

To verify the timezone and language supported by your running docker container can verify the settings by executing the date and locale command:

$ docker exec <CONTAINER-ID> date
Fri Oct 23 15:21:54 UTC 2020

$ docker exec <CONTAINER-ID> locale
LANG=
LC_CTYPE="POSIX"
LC_NUMERIC="POSIX"
LC_TIME="POSIX"
LC_COLLATE="POSIX"
LC_MONETARY="POSIX"
LC_MESSAGES="POSIX"
LC_PAPER="POSIX"
LC_NAME="POSIX"
LC_ADDRESS="POSIX"
LC_TELEPHONE="POSIX"
LC_MEASUREMENT="POSIX"
LC_IDENTIFICATION="POSIX"
LC_ALL=

Replace <CONTAINER-ID> with the docker id of your running container.

In this example we can see that the container is supporting only the most basic setup. But there are ways to change these settings.

Changing Timezone and Locale by Environment Variables

I most cases you can adjust language and timezone with the standard Linux environment variables TZ, LANG, LANGUAGE and LC_ALL. See the following example:

docker run -e TZ="CET" \
   -e LANG="de_DE.UTF-8" \
   -e LANGUAGE="de_DE:de" \
   -e LC_ALL="en_US.UTF-8" \
   -it jboss/wildfly

In this example I run the official Wildfly container with timezone CET and locale de_DE. You can verify the settings again with the date and locale command.

In most cases it will be sufficient to just set the timezone and the en_US UTF-8 support:

docker run -e TZ="CET" \
   -e LANG="en_US.UTF-8" \
   -it jboss/wildfly

Changing Timezone and Language by Dockerfile

Another way is to change the Docker image during build time:

FROM jboss/wildfly:20.0.1.Final

# ### Locale support de_DE and timezone CET ###
USER root
RUN localedef -i de_DE -f UTF-8 de_DE.UTF-8
RUN echo "LANG=\"de_DE.UTF-8\"" > /etc/locale.conf
RUN ln -s -f /usr/share/zoneinfo/CET /etc/localtime
USER jboss
ENV LANG de_DE.UTF-8
ENV LANGUAGE de_DE.UTF-8
ENV LC_ALL de_DE.UTF-8
### Locale Support END ###

CMD ["/opt/jboss/wildfly/bin/standalone.sh", "-b", "0.0.0.0", "-bmanagement", "0.0.0.0"]

In this example I run the localdef and change the language in /etc/locale.conf/

This will build a complete new Image with standard Locale ‘de_DE’ and timzone CET.

Debian Upgrade form Stretch to Buster

Today I updated my Debian system on my working mashine form Stretch to Buster. This is just a short reminder for myself. I followed the blog form nixcraft here.

1. Check version

First check your current version and note if you need it for fixing problems later.

$ lsb_release -a
 No LSB modules are available.
 Distributor ID: Debian
 Description:    Debian GNU/Linux 9.12 (stretch)
 Release:        9.12
 Codename:       stretch
$ uname -mrs
 Linux 4.9.0-12-amd64 x86_64

2. Update installed packages

First bring your strech up to date by updating all your installed packages

$ sudo apt update
$ sudo apt upgrade
$ sudo apt full-upgrade
$ sudo apt --purge autoremove

3. Update /etc/apt/sources.list file

Now you can update your debian package source list from stretch to buster. First check your current versions:

$ cat /etc/apt/sources.list

Now you need to replace the strech references with buster. This can be done quickly with the sed command:

$ sudo cp -v /etc/apt/sources.list /root/
$ sudo cp -rv /etc/apt/sources.list.d/ /root/
$ sudo sed -i 's/stretch/buster/g' /etc/apt/sources.list
$ sudo sed -i 's/stretch/buster/g' /etc/apt/sources.list.d/*

You can verify our new list

$ cat /etc/apt/sources.list 

Finally update you new package list

$ sudo apt update

4. Minimal system upgrade

In the next step you perform a minimal system update to avoid removing to much packages.

$ sudo apt upgrade

Answer question about restart of services wit ‘yes’

5. Upgrading Debain 9 to Debian 10

No you can run the real upgrade to Debain 10.

$ sudo apt full-upgrade

…this will take some time…

6. Reboot and Verification

Finally reboot your system…

$ sudo reboot

…and check the new version

$ uname -r
$ lsb_release -a

7. Clean up

Rund the autoremove command to get rid of old packages:

$ sudo apt --purge autoremove

Thats it! Have fun with fine tuning your new Debian Buster!