Today I run into a maven problem during deployment of my snapshot releases to https://oss.sonatype.org. The upload was canceled with a message like this one:
[ERROR] Failed to execute goal org.sonatype.plugins:nexus-staging-maven-plugin:1.6.13:deploy (injected-nexus-deploy) on project imixs-workflow-index-solr: Failed to deploy artifacts: Could not transfer artifact org.imixs.workflow:imixs-workflow:pom:6.0.7-20240619.183701-1 from/to ossrh (https://oss.sonatype.org/content/repositories/snapshots): authentication failed for https://oss.sonatype.org/content/repositories/snapshots/org/imixs/workflow/imixs-workflow/6.0.7-SNAPSHOT/imixs-workflow-6.0.7-20240619.183701-1.pom, status: 401 Content access is protected by token -> [Help 1]
[ERROR]
[ERROR] To see the full stack trace of the errors, re-run Maven with the -e switch.
[ERROR] Re-run Maven using the -X switch to enable full debug logging.
[ERROR]
[ERROR] For more information about the errors and possible solutions, please read the following articles:
[ERROR] [Help 1] http://cwiki.apache.org/confluence/display/MAVEN/MojoExecutionException
[ERROR]
[ERROR] After correcting the problems, you can resume the build with the command
[ERROR]   mvn <args> -rf :imixs-workflow-index-solr
This may happen if you have overlooked the fact that Sonatype has introduced a new token-based authentication method.
Update your maven settings.xml file
What you need first, is to remove your hard coded userid/password from your maven settings.xml file (located in your home directory .m2/)
Your server config for ossrh should look like this:
<settings>
   <servers>
    <server>
     <id>ossrh</id>
     <username>token-username</username>
     <password>token-password</password>
    </server>
   </servers>
</settings>
For this you need to generate a token first. If you still use your plaintext userid/password this will no longer work. Find details here.
- Login to https://oss.sonatype.org with your normal user account
- Select under your login name the menu option “Profile”
- Click on the ‘Profile’ tab
- Generate a new access token
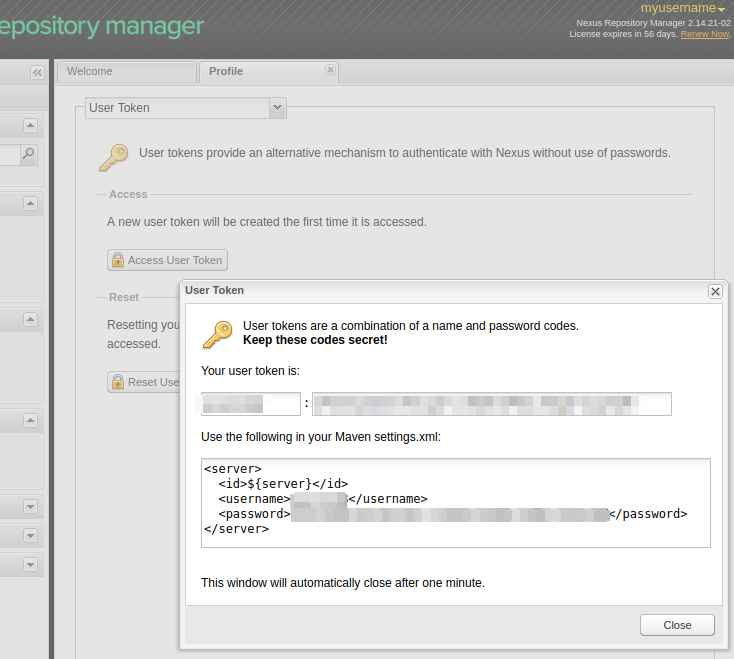
This will show you the token to be replaced with your old userid/password in your settings.xml file
That’s it. Now your deployment should work again.