
In the following short tutorial I want to show how to setup a lightweight and easy to manage docker-swarm environment. This environment is an alternative to the mostly heavyweight solutions like Rancher or Googles Kubernetes. For developers and companies that are not compelled to operate over 1000 machines on 4 different continents, this can be a clever alternative.
The docker-swarm environment, I am demonstrating here, uses Docker Engine CLI commands entered into a terminal. But as we’ll see, this environment also includes a very nice UI front end. You should be able to install Docker on networked machines and be comfortable with running commands in the shell of your choice.
If you are brand new to Docker, see About Docker Engine.
The Environment
The environment setup in this tutorial requires three Linux hosts which have Docker installed and can communicate over a network. These can be physical machines, virtual machines, or hosted in some other way.
In the following section I will use Docker Machine to install three hosts locally for testing. For more details how docker-machine is working you may take a look into the docker documentation for docker machine and the docker-swarm tutorial.
So lets start….
Create the Machines
This tutorial is based on virtual machines running within docker-machine and consists of one manager (manager1) and two workers (worker1, worker2).
Note: In production you don’t need docker-machine. You just have to make sure that docker is installed on your internet machines and the machine can talk to each other via internet IP address or DNS name.
To create the 3 machines locally with docker-machine you can run the following commands:
$ docker-machine create --driver virtualbox manager1
$ docker-machine create --driver virtualbox worker1
$ docker-machine create --driver virtualbox worker2
The machine ‘manager1‘ will act as the swarm manager, which executes management commands and authenticates workers to join the swarm. The machine ‘worker1‘ and ‘worker2‘ will run as workers which are serving our containers.
To test your new environment run the command:
$ docker-machine ls
 NAME ACTIVE DRIVER STATE URL SWARM DOCKER ERRORS
 manager1 - virtualbox Running tcp://192.168.99.100:2376 v17.11.0-ce
 worker1 - virtualbox Running tcp://192.168.99.101:2376 v17.11.0-ce
 worker2 - virtualbox Running tcp://192.168.99.102:2376 v17.11.0-ce
You will see the IP addresses docker-machine has created for you local test servers. We need these addresses later.
You can start and stop the machines with the command:
$ docker-machine stop worker1
$ docker-machine start worker1
Note: If you restart the machines the IP address can change!
Docker-machine allows you to execute ssh commands directly form your local host on one of the machines. The following example will list the home directory of manager1:
docker-machine ssh manager1 "ls -la ./"
We use the ‘ssh’ and ‘scp’ commands in the next sections to copy files and start services in our machines.
Init the swarm manager
Next we need to setup docker swarm on the machine ‘manager1‘. To init ‘manager1’ (with the IP address 192.168.99.100) as the swarm manager, run the following ssh command in manager1:
$ docker-machine ssh manager1 "docker swarm init --advertise-addr 192.168.99.100"
This command will be executed directly on our machine “manager1“. As you can see, the response to this command contains a pre-configured docker swarm join command for you to be executed on any nodes you want to add to the swarm. Copy this command, and send it to worker1 and worker2 via docker-machine ssh to have the workers join the new swarm:
$ docker-machine ssh worker1 "docker swarm join --token SWMTKN-1-5acc79cslx8z9hy8zcobgkbfxth4t3133ts8s7a1vxap1vwud9-04n5qiicw4qopj3zk32jm5qay 192.168.99.100:2377"
$ docker-machine ssh worker2 "docker swarm join --token SWMTKN-1-5acc79cslx8z9hy8zcobgkbfxth4t3133ts8s7a1vxap1vwud9-04n5qiicw4qopj3zk32jm5qay 192.168.99.100:2377"
The IP address given here is the IP from the machine “manager1”.
To verify the nodes in our swarm run:
$ docker-machine ssh manager1 "docker node ls"
ID HOSTNAME STATUS AVAILABILITY MANAGER STATUS
niskvdwg4k4k1otrrnpzvgbdn * manager1 Ready Active Leader
c54zgxn45bvogr78qp5q2vq2c worker1 Ready Active
g4mq3fqjchaffrmdjpy57j46l worker2 Ready Active
That’s it – you have created the swarm running on three machines!
The Swarm UI – swarmpit.io
Now it’s time to setup a UI to get away from the command line interface. Swarmpit is a lightweight Docker Swarm management UI. To install this UI on our machine “master1” follow these steps:
Create a local working directory named ‘swarmpit’ and add a docker-compose.yml file with the following content:
version: '3'

services:
 app:
   image: swarmpit/swarmpit:1.2
   environment:
     SWARMPIT_DB: http://db:5984
   volumes:
      - /var/run/docker.sock:/var/run/docker.sock:ro
   ports:
     - 888:8080
   networks:
     - net
   deploy:
     placement:
       constraints:
         - node.role == manager
 db:
   image: klaemo/couchdb:2.0.0
   volumes:
     - db-data:/opt/couchdb/data
   networks:
     - net

networks:
   net:
     driver: overlay

volumes:
   db-data:
     driver: local
To copy this file from your working directory into “manager1” run the following commands:
$ docker-machine ssh manager1 "mkdir ./swarmpit"
$ docker-machine scp docker-compose.yml manager1:./swarmpit/
Now you can start the swarmpit service on manager1 based on the definition of the docker-compose.yml file:
$ docker-machine ssh manager1 "docker stack deploy -c swarmpit/docker-compose.yml swarmpit"
Note: It can take some minutes until swarmpit is started on the machine ‘manager1‘ – So don’t be too impatient.
After the swarmpit was started you can access the UI from your browser using the IP address of manager1 and the port 888
The default userid is ‘admin’ with the password ‘admin’.

Swarmpit gives you a great UI to see what’s going on in your docker-swarm. You can also install services directly from the UI.
Create a Private Docker-Registry
Docker images are available on docker registries. Public docker images are basically available on Docker Hub. For private docker images a private registry is needed. The following section explains how a private registry can be hosted on the docker-swarm machine manager1.
The goal is to push locally build docker images to the docker registry, so that the cloud infrastructure can pull and start those services without the need to build the images from a Docker file.
Create a Self Signed Certificate
A private registry should be secured with a TLS (Transport Layer Security). This guaranties that only authorized clients can push or pull an image from the registry. To secure the registry, you first need to create a self signed certificate for the host “manager1” which is used to authenticate against the private Docker Registry.
First you need to create a DNS entry for the IP address of the machine “manager1”. In the previous examples I used the IP address 192.168.99.100 directly. But for the certificate a DNS host name is mandatory. For your local test you can define an DNS name like “manager1.local” in your local etc/hosts file.
192.168.99.100 manager1.local
In production you would usually have a DNS entry for your hosts.
Now you can easily create a certificate with the OpenSSL-Tool locally:
$ mkdir ./registry && cd ./registry
$ openssl req -newkey rsa:4096 -nodes -sha256 \
            -keyout domain.key -x509 -days 356 \
            -out domain.cert
            Generating a 4096 bit RSA private key
................................................++
writing new private key to 'registry_certs/domain.key'
-----
You are about to be asked to enter information that will be incorporated
into your certificate request.
What you are about to enter is what is called a Distinguished Name or a DN.
There are quite a few fields but you can leave some blank
For some fields there will be a default value,
If you enter '.', the field will be left blank.
-----
Country Name (2 letter code) [AU]:DE
State or Province Name (full name) [Some-State]:
Locality Name (eg, city) []:
Organization Name (eg, company) [Internet Widgits Pty Ltd]:
Organizational Unit Name (eg, section) []:
Common Name (e.g. server FQDN or YOUR name) []:manager1.local
Email Address []:
In this example I created a x509 certificate and a private RSA key. The ‘Common Name’ is important here, as this is the server host name we defined before with our DNS entry. Note, that in production you would use a internet domain name here!
Finally you have created two files:
- domain.cert – this file can be handled to the client using the private registry
- domain.key – this is the private key which is necessary to run the private registry with TLS
Next you can copy the certificate files to the manager1 into the folder ‘registry/certs/’:
$ docker-machine ssh manager1 "mkdir -p ./registry/certs"
$ docker-machine scp domain.cert manager1:./registry/certs/
$ docker-machine scp domain.key manager1:./registry/certs/
Create a docker-compose.yml file with the following content:
version: '3'

services:
 app:
   image: registry:2
   environment:
     REGISTRY_HTTP_TLS_CERTIFICATE: /certs/domain.cert
     REGISTRY_HTTP_TLS_KEY: /certs/domain.key
   volumes:
     - ~/registry/certs:/certs
   ports:
     - 5000:5000
   networks:
     - net
   deploy:
     placement:
       constraints:
         - node.role == manager
networks:
   net:
     driver: overlay
copy the docker-compose.yml file into manager1:
$ docker-machine scp docker-compose.yml manager1:./registry/
Now you can start the registry on manager1 with the command:
$ docker-machine ssh manager1 "docker stack deploy -c registry/docker-compose.yml registry"
The local registry is now available under the address:
https://manager1.local:5000
You can check the registry API via the Rest API:
https://manager1.local:5000/v2/
Grant a Client
To grant your local client to be allowed to push/pull images from the new private docker registry, you need to copy the certificate into the docker certs.d directory of local client and restart your local docker service:
$ mkdir -p /etc/docker/certs.d/manager1.local:5000
$ cp domain.cert /etc/docker/certs.d/manager1.local:5000/ca.crt
$ service docker restart
Push a local image
After the registry was started you can push a local image into the registry. The following example pulls swarmpit form dockerhub and tags/pushes the image into our private registry:
$ docker pull swarmpit/swarmpit:1.2
$ docker tag swarmpit/swarmpit:1.2 manager1.local:5000/swarmpit/swarmpit:1.2
$ docker push manager1.local:5000/swarmpit/swarmpit:1.2
The push refers to a repository [manager1.local:5000/swarmpit/swarmpit]
6afcf119ad8f: Pushed
830626953b30: Pushed
a1e7033f082e: Pushed
78075328e0da: Pushed
9f8566ee5135: Pushed
1.2: digest: sha256:2ec2c601c936c904aba991a8a2f0961b2382e6c0483fbec1997896e7422030ab size: 1366
Add the Private Registry with swarmpit
Now you can also add your private registry into swarmpit. Use the menue “Registry -> NEW REGISTRY“. Add the URL “https://192.168.99.100:5000/”
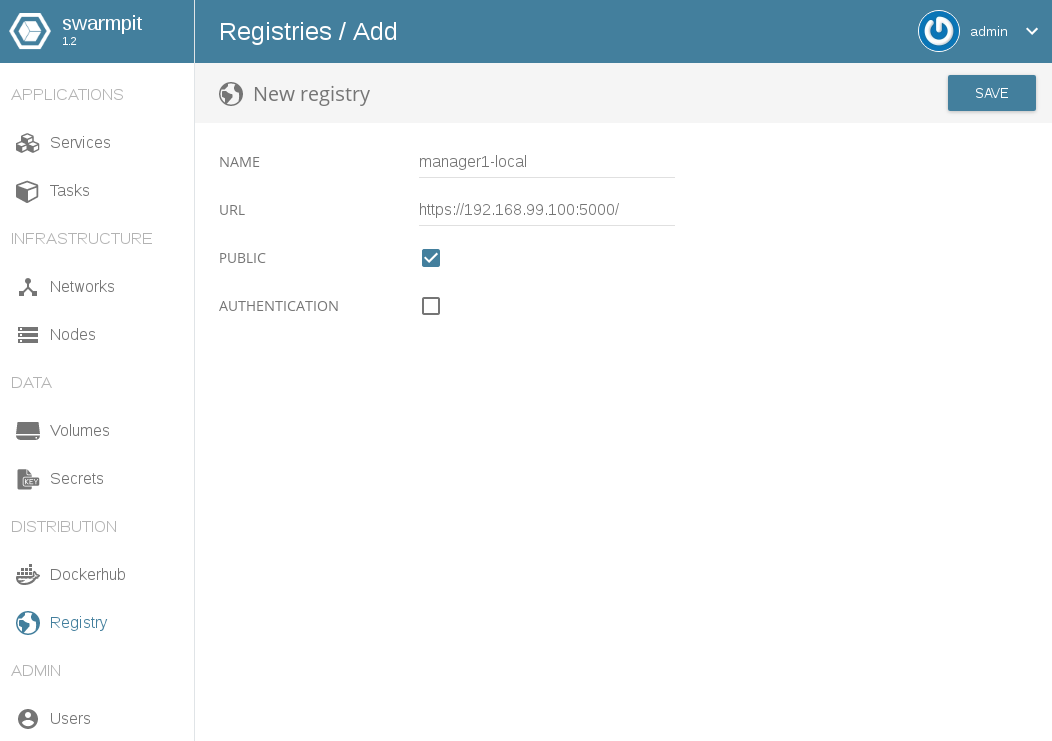
Here I use the IP address (192.168.99.100) because machine ‘manager1’ did not now our new local DNS entry ‘manager1.local’. In production you should deal with DNS entries only!
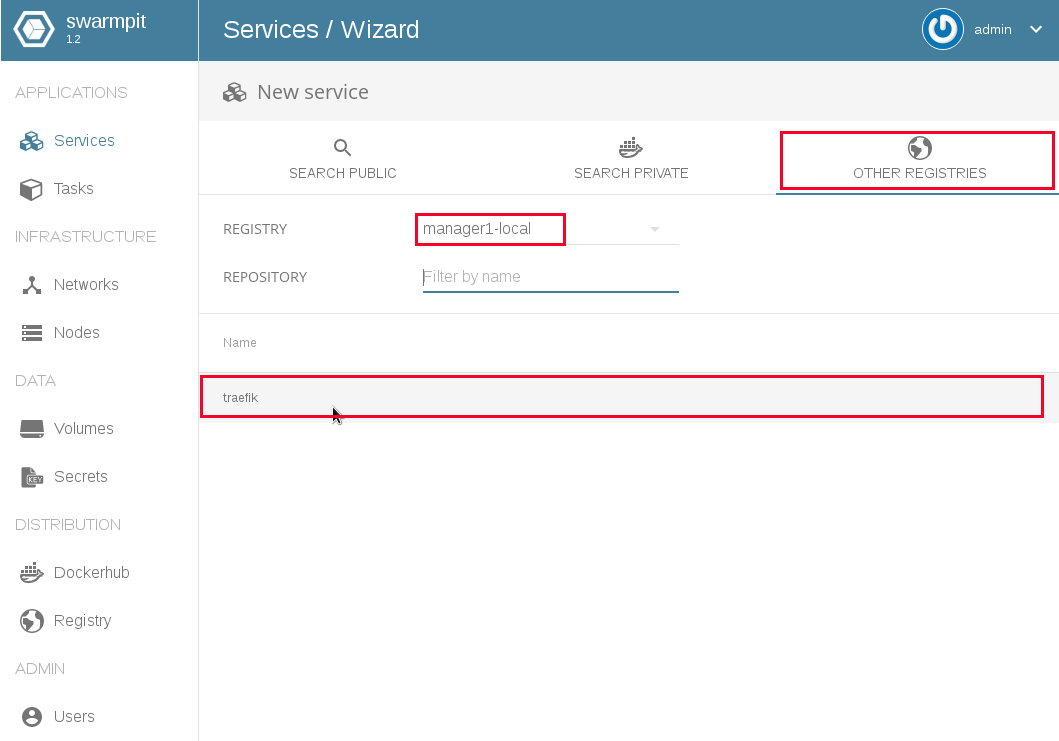
From the new added private registry you can now search for images pushed into the registry and create a new service directly from the UI of swarmpit:
The HTTP Reverse Proxy – traefik.io
The final thing we need in our environment is a reverse proxy. A HTTP reverse proxy is used to hide our services from the internet. In addition the proxy also acts as a load balancer to be used if you need to scale your application over several nodes.
traefik.io is a reverse proxy with a nice UI. To deploy traefik into the environment first create an overlay network for traefik to use.
docker-machine ssh manager1 "docker network create --driver=overlay traefik-net"
This network will be later used to start new services to be reached through the traefik proxy service.
To start traefil in this network run:
docker-machine ssh manager1 "docker service create \
    --name traefik \
    --constraint=node.role==manager \
    --publish 80:80 \
    --publish 8080:8080 \
    --mount type=bind,source=/var/run/docker.sock,target=/var/run/docker.sock \
    --network traefik-net \
    traefik:v1.4.4 \
    -l DEBUG \
    --docker \
    --docker.swarmmode \
    --docker.domain=traefik \
    --docker.watch \
    --web"
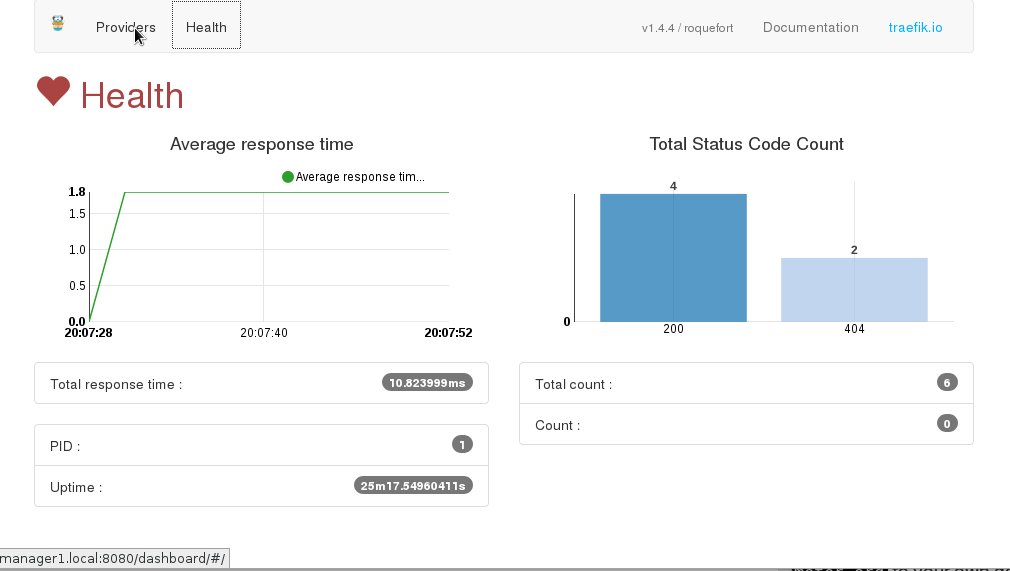
After traefik is stared you can access the web UI via port 8080
Now you can start deploying web applications into the swarm within the network traefik-net. Those applications will be accessible via the traefik proxy server. To test the proxy you can deploy a simple test service /emilevauge/whoami . This docker container simply displays the location of itself.
docker-machine ssh manager1 "docker service create \
    --name whoami1 \
    --label traefik.port=80 \
    --network traefik-net \
    --label traefik.frontend.rule=Host:whoami.local\
    emilevauge/whoami"
In this example the label traefik.frontend.rule=Host:whoami.local is a local dns name under which the application can be accessed. When you open the traefik frontend, the new service will be listed:
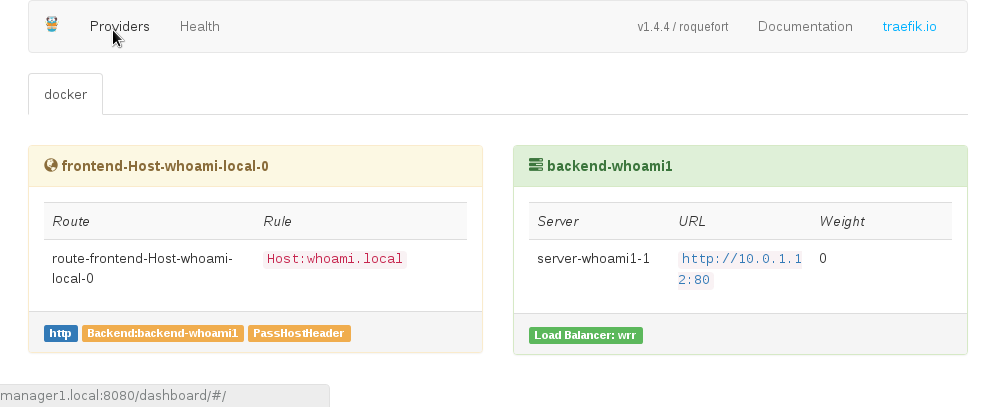
If you have added the DNS entry into your local hosts file pointing to the machine manager1 (192.168.99.100), the web application can be opend from this URL:
HTTPS with Let’s encrypt
Traefik will automatically detect new containers starting in the swarm and provides a front end domain on HTTP port 80 or HTTPS 443. For HTTPS you can easily install certificates with Let’s encrypt.
So – that’s it. Now you have a basic docker-swarm setup with a nice UI.
You can also follow my project ‘Imixs-Cloud’ on GitHub.
Had an issue pushing to the registry on mac. Need to add the certificate on a client using keychain
sudo security add-trusted-cert -d -r trustRoot -k /Library/Keychains/System.keychain
reference: https://www.bounca.org/tutorials/install_root_certificate.html
Thanks a lot for this info!