
UPDATE: I updated this origin post to the latest Version 4.0 of Cassandra.
In one of my last blogs I explained how you can setup a cassandra cluster in a docker-swarm. The advantage of a container environment like docker-swarm or kubernetes is that you can run Cassandra with its default settings and without additional security setup. This is because the cluster nodes running within a container environment can connect securely to each other via the kubernetes or docker-swarm virtual network and need not publish any ports to the outer world. This kind of a setup for a Cassandra cluster can be fine for many cases. But what if you want to setup a Cassandra cluster in a more open network? For example in a public cloud so you can access the cluster form different services or your client? In this case it is necessary to secure your Cassandra cluster.
Start a Cassandra Node with Docker
Let’s start with installing Cassandra as a single node. Running a Cassandra node with official docker image is the most convenient way to start. For the following examples, I assume that you have at least one public internet server with Docker installed.
So for a first simple test just run the following command on your server to start Cassandra:
$ docker run --name cassandra -d \
    -e CASSANDRA_BROADCAST_ADDRESS=[YOUR-NODE-IP-ADDRESS] \
    -p 7000:7000 \
    -p 9042:9042 \
    --restart always\
    cassandra:4.0.6
Replace [YOUR-NODE-IP-ADDRESS] with your public IP of your server. This will bring up the first cluster node.
You can check the logfiles with:
$ docker logs -f cassandraOr you can check the status of your cluster with:
$ docker exec -it cassandra nodetool status
Datacenter: datacenter1
=======================
Status=Up/Down
|/ State=Normal/Leaving/Joining/Moving
--  Address       Load       Tokens       Owns (effective)  Host ID                               Rack
UN  111.xx.xx.xx  75.79 KiB  256          100.0%            1afce141-xxx-xxx-b193-d651b8cd0d0a  rack1
Secure Your Cluster
Now, the problem with this setup is that everyone can access your server. Of course, this should not be the case! So we need to harden our Cassandra cluster node. For that we should secure the client access with username/password and we should encrypt the node-to-node communication as well as the client-node-communication. You can find a general information about this topic on the Cassandra project documentation.
In the following, I describe a very simple and straightforward approach to adequately protect a cluster. For that I generate exactly one Public/Private Key-Pair to be used to encrypt the network communication. In many blogs and tutorials you will see that the author creates a lot of separate key files for each server node and also for each client. This can be useful if you plan to setup a very large environment or if you do not trust every client or server within your network. But for smaller environments with only a few dozens of servers, it is sufficient to use a common private key for the node-to-node communication and a common public key for the client-to-node communication.
As a result we will need the following key files:
- cassandra.keystore – a Java Keystore file containing the private key
- cassandra.keystore.pks12 – an optional keystore in pks format
- cassandra.truststore – a Java Truststore containing the public key
- cluster-cer – the cluster certificate file
- cluster-cer.pem – the cluster certificate file in pem format
- cluster-cer.key – the cluster private key in in pem format
All we need for our further setup are the files
- cassandra.keystore
- cassandra.truststore
- cluster-cer
But it’s good to have all the other optional formats if you plan to extend your security concept later.
Create Key Files and Certificates
To generate the keystore, the truststore and the cert file I wrote a shell script which can be downloaded from GitHub Gist with the following link: cassandra-key-generator.sh . The file is documented by comments, so you can easily understand what happens and of course you can generate the keys manually step by step if you like.
You can run the script from your local machine with the following command:
$ generate-keys.sh my-cluster mypasswordWhere [my-cluster] is the name of your cluster and the name of the certificate. The [mypassword] is the password to be used to secure the keystore and the truststore file. As a result of running the script you will see the newly created files mentioned above.
Push Keys and Certificates into Your Cluster Nodes
Now that you have all of the files created, you need to place them on your sever node so that Cassandra can find them later. I assume here that you have a SSH connection from your machine to your server. In this case you can use the SCP tool to copy the files up into your server node:
$ scp certs/* user@my-cluster.foo.com:security/The files are now stored in the server directory /security/. You can repeat this step for every cluster node. If you don’t have an ssh/scp, you can use FTP or any other appropriate tool to transfer the files to your server.
Harden the Cluster
Next we can harden the cassandra node by changing the cassandra.yaml file. If you have started the docker container before you can copy the origin version of cassandra.yaml with:
$ docker exec -it cassandra cat /etc/cassandra/cassandra.yamlCopy this file into your home directory on your server node and customize the sections ‘server_encryption_options‘ and ‘client_encryption_options‘ as followed:
...
server_encryption_options:
    #internode_encryption: none
    internode_encryption: all
    keystore: /security/cassandra.keystore
    keystore_password: mypassword
    truststore: /security/cassandra.truststore
    truststore_password: mypassword

# enable or disable client/server encryption.
client_encryption_options:
    enabled: true
    optional: false
    keystore: /security/cassandra.keystore
    keystore_password: mypassword
    require_client_auth: false
....
# enable password authentication!
authenticator: PasswordAuthenticator
...
With this setup we activate the server and client encryption.
Note: with the client_encryption_option “require_client_auth: false” a so called One Way SSL connection is configured. This means, the client only verifies the server’s certificate. If you activate this option with ‘true’ a Two Way SSL connection will be expected. The One-Way-SSL connection offers a decent degree of security. See also the discussion here.
At least in the section ‘authenticator’ of the cassandra.yml file we set the PasswordAuthenticator. This requires a client to authenticate with user/password (see below).
Startup Cassandra Nodes in Secure Mode
Now as we have copied our keys and certificates and customized the cassandra.yaml file we can start Cassandra with Docker by mapping the necessary files as volumes:
$ docker run --name cassandra -d \
    -e CASSANDRA_BROADCAST_ADDRESS=[YOUR-NODE-IP-ADDRESS] \
    -p 7000:7000 \
    -p 9042:9042 \
    -v ~/cassandra.yaml:/etc/cassandra/cassandra.yaml\
    -v ~/cqlshrc:/root/.cassandra/cqlshrc\
    -v ~/security:/security\
    --restart always\
    cassandra:4.0.6
Again replace [YOUR-NODE-IP-ADDRESS] with your public IP. Note that I placed all my key files in a directory named ‘security/’ to map this files as a volume.
NOTE: Since version 4.0 of Cassandra the port 7000 handles both – encrypted and unencrypted communication. In older version 3.x encrypted communication was only possible via port 7001
You can monitor the startup process with:
$ docker logs -f cassandraYou should see a message in the log file like below indicating that encryption is activated.:
... Internode messaging enabled TLS protocols: TLSv1, TLSv1.1, TLSv1.2, TLSv1.3
....
Start Up a Second Node….
If you start a second node joining your cluster, you need to seed pointing to the first node. See the following example:
$ docker run --name cassandra -d \
    -e CASSANDRA_BROADCAST_ADDRESS=[YOUR-NODE-IP-ADDRESS] \
    -e CASSANDRA_SEEDS=[FIRST-CLUSTER-NODE-IP-ADDRESS] \
    -p 7000:7000 \
    -p 9042:9042 \
    -v ~/cassandra.yaml:/etc/cassandra/cassandra.yaml\
    -v ~/cqlshrc:/root/.cassandra/cqlshrc\
    -v ~/security:/security\
    --restart always\
    cassandra:4.0.6
Note: It is important to take care about the BROADCAST and SEEDS addresses in this command. The parm CASSANDRA_SEEDS should always point to other Nodes in the cluster and never to it self. So the start command is different for each node in your cluster.
To check the status run agin:
$ docker exec -it cassandra nodetool status
Datacenter: datacenter1
=======================
Status=Up/Down
|/ State=Normal/Leaving/Joining/Moving
--  Address       Load       Tokens       Owns (effective)  Host ID                               Rack
UN  xxx.xx.xx.xx  70.03 KiB  256          100.0%            eecd45d0....95  rack1
UN  xxx.xx.xx.xx  113.31 KiB  256         100.0%            09ec9.......f8  rack1
Setup cqlshrc
Finally create a file named ‘cqlshrc‘ . This file is later used to connect to the cluster using cqlsh. Create the file with the following content:
[connection]
hostname = localhost
port = 9042
factory = cqlshlib.ssl.ssl_transport_factory
[ssl]
certfile =  /security/my-cluster.cer.pem
validate = false
We only need the certfile here as we do not use client keys to authenticate the client.
Test the Client Authentication
Now you can test if everything works as expected. To test the client connection you can use the cqlsh command-line tool. But you can no longer call it without credentials:
$ docker exec -it cassandra cqlsh
Connection error: ('Unable to connect to any servers', {'127.0.0.1': AuthenticationFailed('Remote end requires authentication.',)})
Use the -u option to login as a superuser and the option –ssl to force encryption:
$ docker exec -it cassandra cqlsh -u cassandra --sslNow you will be prompted for the password. The default password for the superuser ‘cassandra’ is ‘cassandra’.
$ docker exec -it cassandra cqlsh -u cassandra --ssl
Password:
Connected to Test-Cluster at 127.0.0.1:9042
[cqlsh 6.0.0 | Cassandra 4.0.6 | CQL spec 3.4.5 | Native protocol v5]
Use HELP for help.
imixs@cqlsh>
Congratulates! You have successful connected in a secure and encrypted way to your cluster. Next you should change the password for the superuser and create a second user account with:
ALTER USER cassandra WITH PASSWORD 'xxxxxxxxx';
CREATE USER myuser WITH PASSWORD 'yyyyyyy';
Firewall Setup
As explained in the beginning this Cassandra cluster is now available on public internet addresses. This requires some security considerations. We want to avoid that unauthorized users can access our cluster.
The necessary ports to be opened are:
- 22 – SSH
- 7000 -> Inter-Node-Communication
- 9042 -> Client-Communication (e.g. from a Java client)
To protect my cluster nodes I use the firewall tool ufw. You should familiarize yourself with the ufw tool to prevent you from locking yourself out of your server.
We simply can restrict public access to port 22 (ssh) and 7000 and 9042. All other incoming trafic can be blocked.
To do so I run the following commands to secure my node:
$ ufw allow ssh
$ ufw allow from <NODE-1> comment 'inter-node-communication'
$ ufw allow from <NODE-2>
$ ufw allow from <NODE-3>
$ ufw allow from <CLIENT-1> comment 'allow client server'
....
$ ufw default allow outgoing
$ ufw default deny incoming

$ sudo ufw enable
You can verify the status with
$ sudo ufw status verboseRepeat the step on each node.
To disable the firewall run:
$ sudo ufw disableHow to Connect with DataStax Client form Java
After you have setup the client-to-node encryption also using the DataStax Java client need to establish a SSL connection. General information can be found here.
To create a SSL client connection you need a Builder with SSL options and user credentials:
....
Builder builder = Cluster.builder();
...
SSLOptions options = createSSLOptions();
builder = builder.withSSL(options);
builder = builder.withCredentials(userid, password);
cluster = builder.build();
cluster.init();
...
To create the SSLOptions you can implement the following helper method. At least the variable ‘truststorePath’ must point to the cassandra.truststore file created before.
private SSLOptions createSSLOptions() throws KeyStoreException, FileNotFoundException, IOException,
        NoSuchAlgorithmException, KeyManagementException, CertificateException, UnrecoverableKeyException {

    TrustManagerFactory tmf = null;
    if (truststorePath != null && !truststorePath.isEmpty()) {
        KeyStore tks = KeyStore.getInstance("JKS");
        tks.load((InputStream) new FileInputStream(new File(truststorePath)), truststorePwd.toCharArray());
        tmf = TrustManagerFactory.getInstance(TrustManagerFactory.getDefaultAlgorithm());
        tmf.init(tks);
    } else {
        logger.info("SSLOptions without truststore...");
    }

    KeyManagerFactory kmf = null;
    if (null != keystorePath && !keystorePath.isEmpty()) {
        KeyStore kks = KeyStore.getInstance("JKS");
        kks.load((InputStream) new FileInputStream(new File(keystorePath)), keystorePwd.toCharArray());
        kmf = KeyManagerFactory.getInstance(KeyManagerFactory.getDefaultAlgorithm());
        kmf.init(kks, keystorePwd.toCharArray());
    } else {
        logger.info("SSLOptions without keystore...");
    }

    SSLContext sslContext = SSLContext.getInstance("TLS");
    sslContext.init(kmf != null ? kmf.getKeyManagers() : null, tmf != null ? tmf.getTrustManagers() : null,
            new SecureRandom());
    RemoteEndpointAwareJdkSSLOptions sslOptions = RemoteEndpointAwareJdkSSLOptions.builder()
            .withSSLContext(sslContext).build();
    return sslOptions;
}
Note: We only need to provide our client with the truststore file containing the public key.
That’s it – now you communication with your public Cassandra cluster is secured by user/password and encrypted.
Monitoring
There are several web tools available to monitor a Cassandra cluster. But all these tools involve a certain amount of installation effort. To get some insights of your cluster nodes you can use the core linux and cassandra command line tools:
CPU and Memory
On your node you get general insights with htop:
$ htop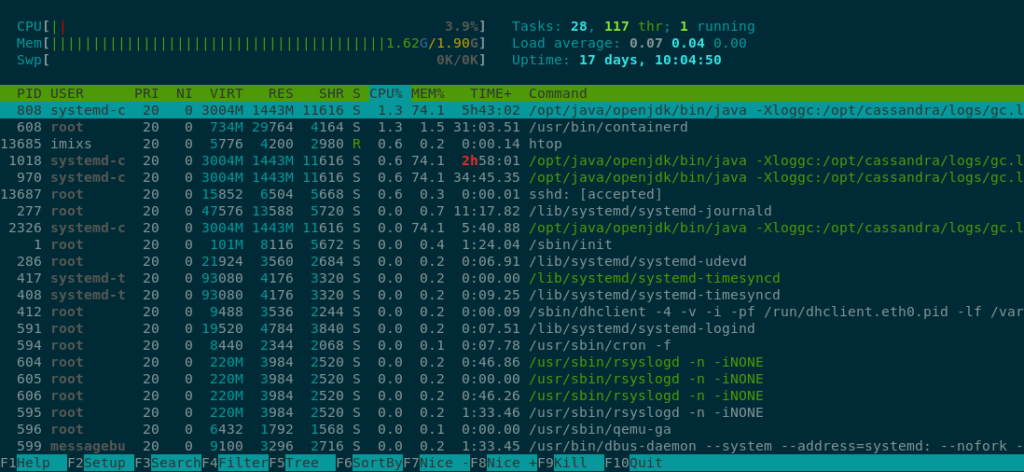
Here you can see memory and CPU load which gives a good overview what is going on.
Disk Space
To check diskspace on your node simply use the df command:
$ df -h
Filesystem      Size  Used Avail Use% Mounted on
udev            958M     0  958M   0% /dev
tmpfs           195M   20M  175M  11% /run
/dev/sda1        19G  3.4G   15G  19% /
tmpfs           974M     0  974M   0% /dev/shm
tmpfs           5.0M     0  5.0M   0% /run/lock
tmpfs           974M     0  974M   0% /sys/fs/cgroup
/dev/sda15      121M  130K  120M   1% /boot/efi
tmpfs           195M     0  195M   0% /run/user/1000
Nodetool
With the Cassandra build in nodetool command you can check your cluster overall status. You can start the nodetool from your host through the docker exec command:
$ docker exec -it cassandra nodetool status
Datacenter: datacenter1
=======================
Status=Up/Down
|/ State=Normal/Leaving/Joining/Moving
--  Address        Load    Tokens   Owns (effective)  Host ID   Rack
UN  xx.xx.xx.xx  110.06 MiB  256    100.0%   7184d310-...  rack1
UN  yy.yy.yy.yy  109.89 MiB  256    100.0%   eecd45d0-...  rack1
UN  zz.zz.zz.zz  109.79 MiB  256    100.0%   09ec94a5-...  rack1
Interesting here is the column ‘Owns’ which indicates how your data is replicated among all cluster nodes.
I did not get your example here to work since you are binding the first and the second Cassandra instance to the same port in the host, this binding fails with the error: “Bind for 0.0.0.0:9042 failed: port is already allocated.”. How did you accomplish to bind the second node to the same port in the host were you start your docker instances?
In this blog I assume that you run the nodes on different public internet servers. If you want to test cassandra first locally you can do this with docker-compose. See this blog:
https://ralph.blog.imixs.com/2019/06/24/cassandra-and-docker-swarm/